Yes. The complete plan is available to read on this page.
THE FREE BUILD GUIDE
Farmhouse Media Console
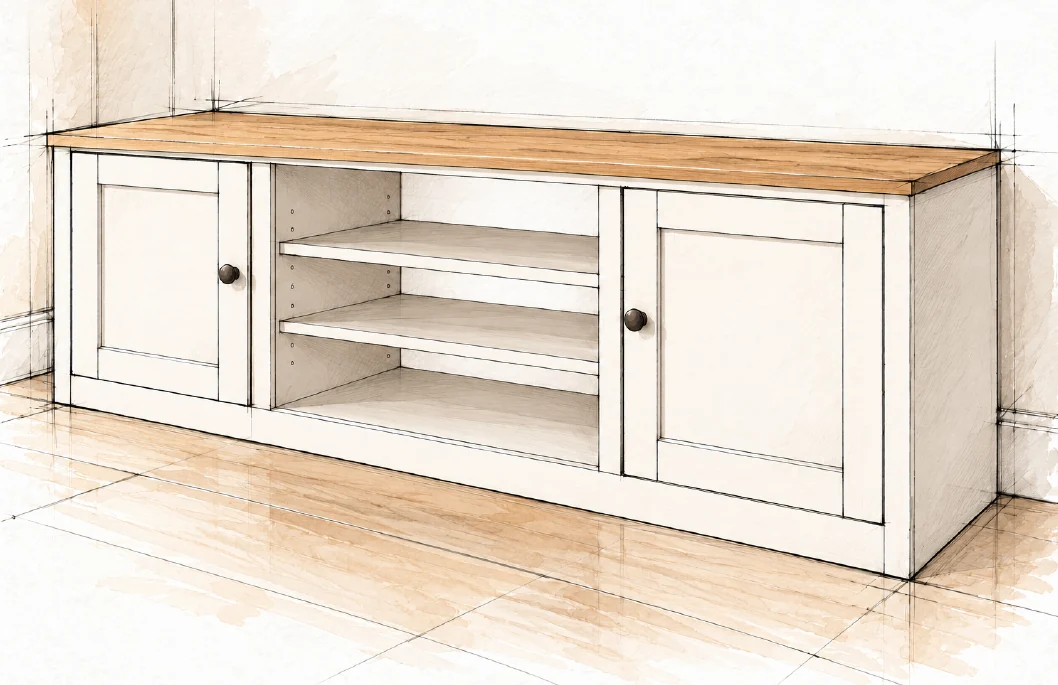
A low, open-backed console with inset doors and adjustable center shelves.
READ BEFORE BUILDING
Plan the complete build
What you will make
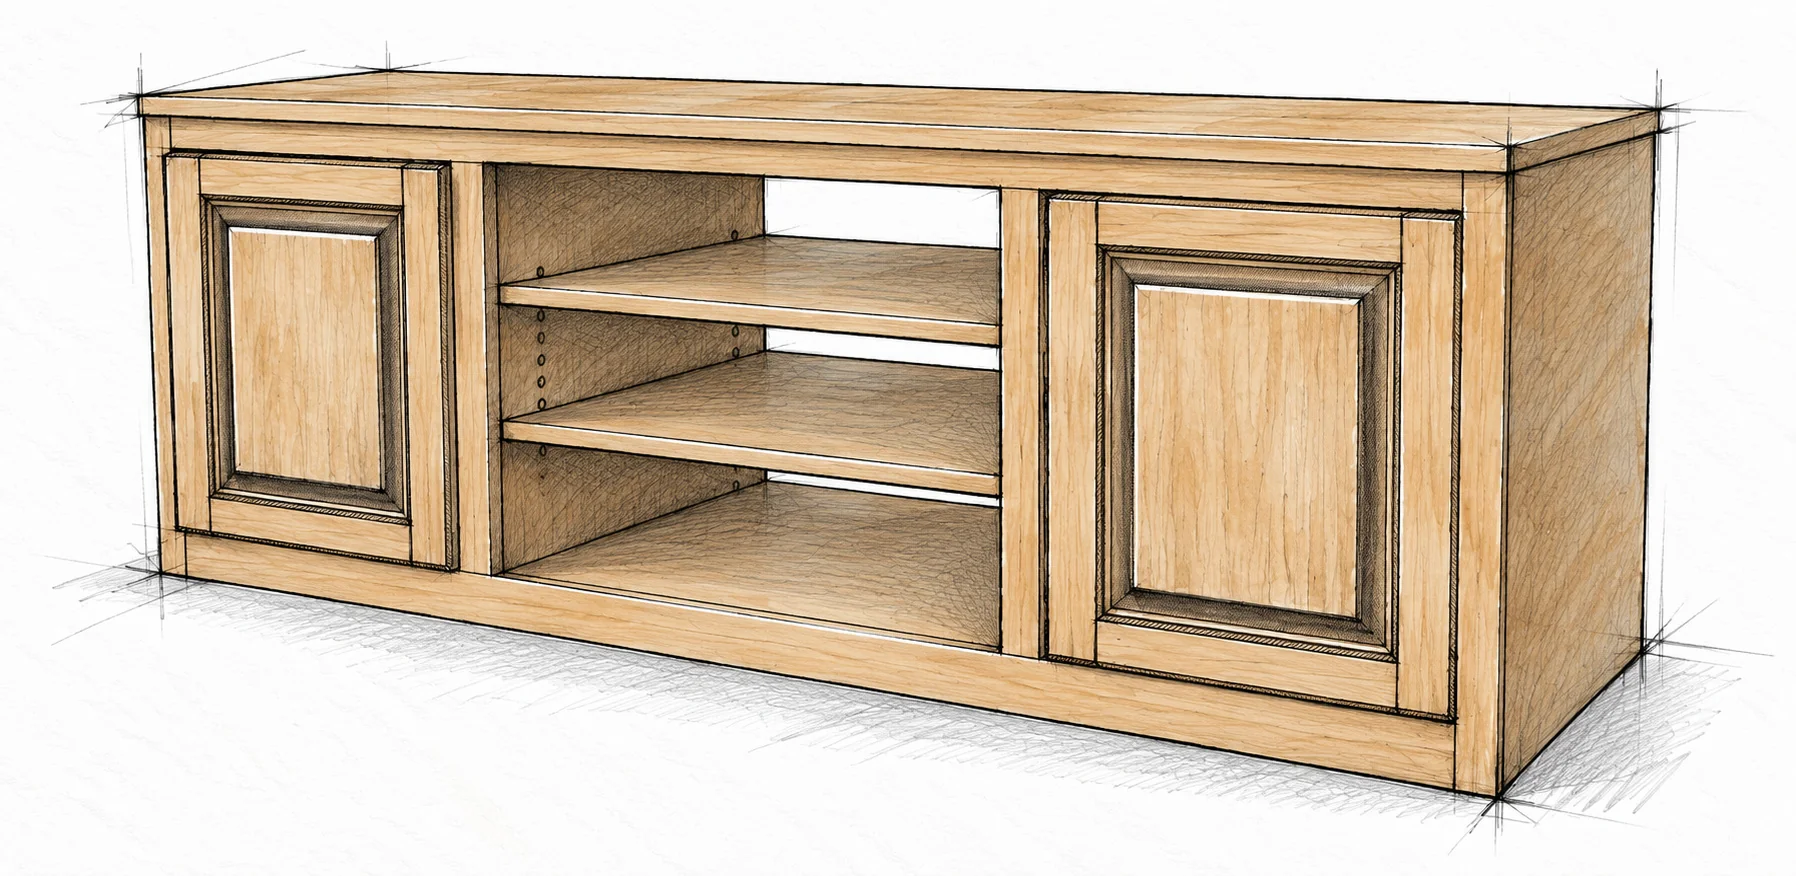
Build only the low console: two side cupboards, two adjustable center shelves and two flat plywood inset doors. There is no back panel. The finish illustration is a color suggestion, not a different construction.
Precision matters
This is an intermediate cabinet project. Dados are shallow channels that locate plywood panels; rabbets are channels open at an edge. Door rails are horizontal members; stiles are vertical members. Practice grooves, tongues and joints on offcuts first.
Choose hardware first
Obtain inset hinges for a 3/4 in (19.1 mm) thick door and face-frame cabinet before trimming doors. The door blanks match the nominal opening; trim to the selected hinge clearance and an even working reveal, not to a guessed gap.
Read drawings with the cut list
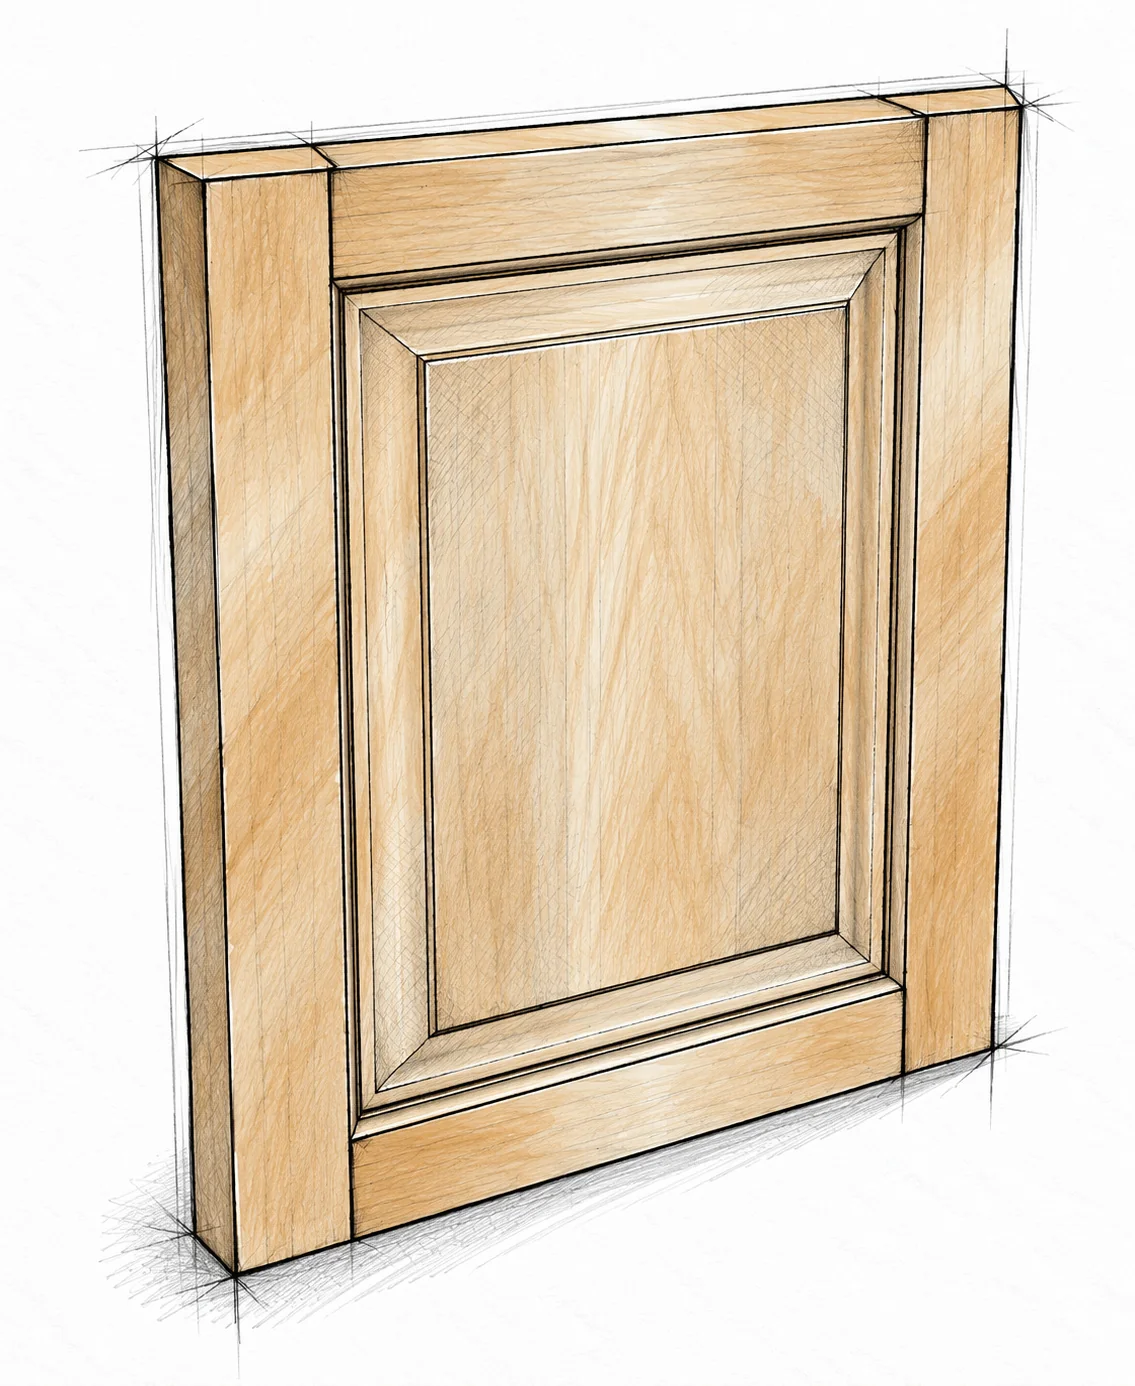
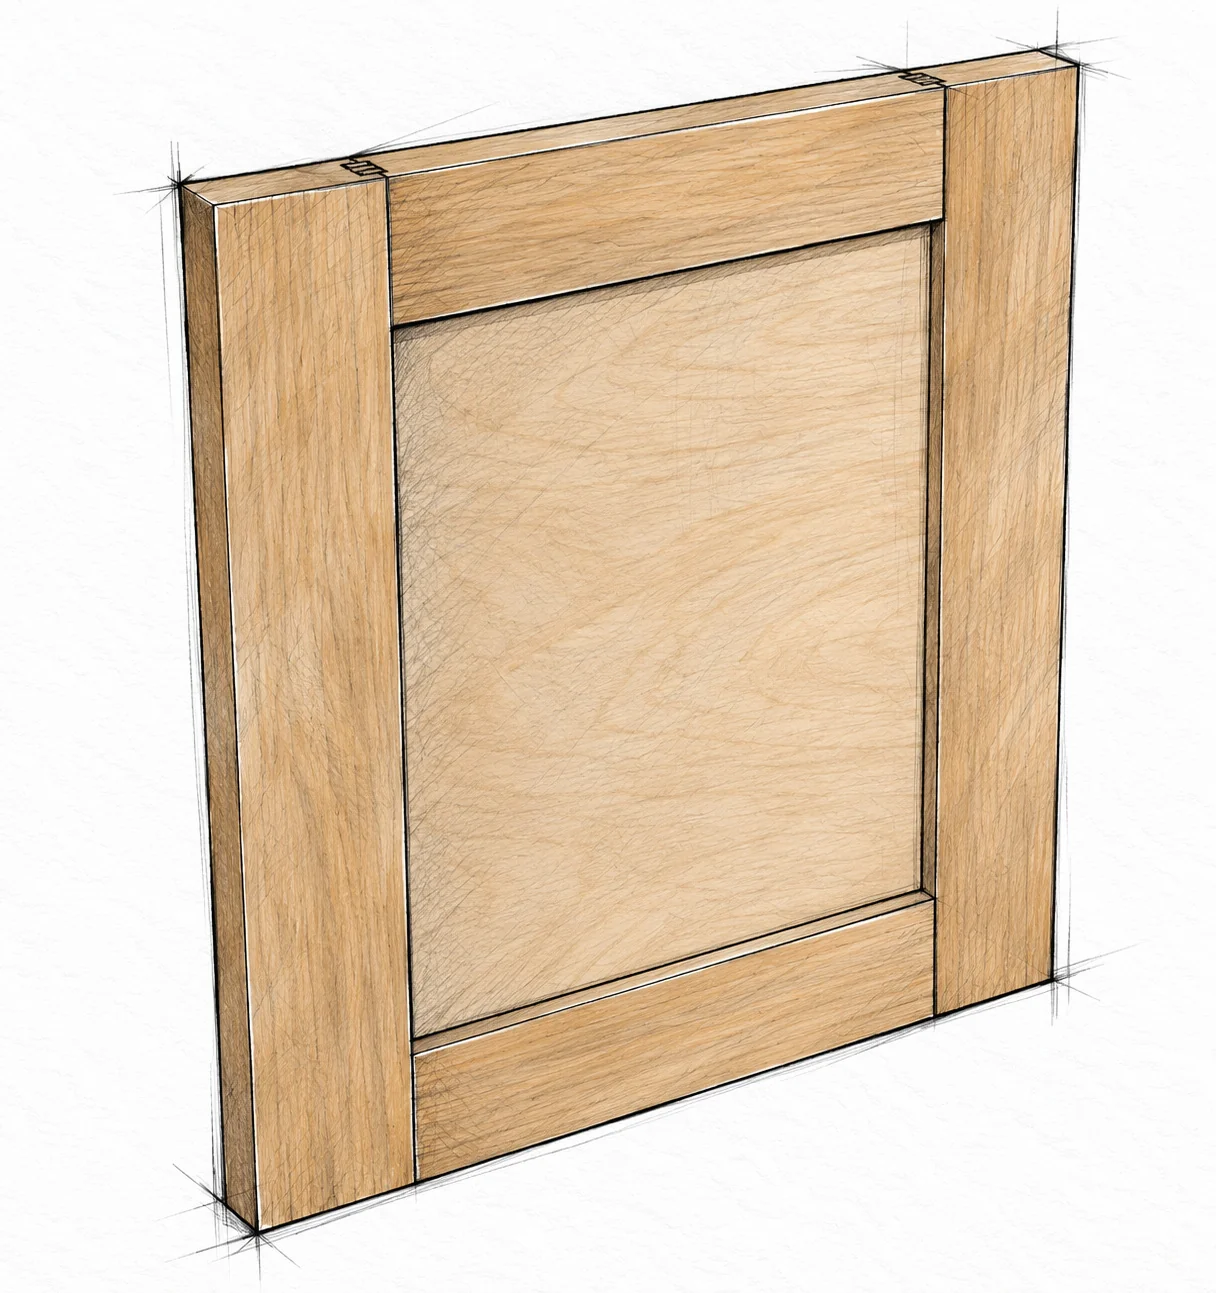
Illustrations explain shape and sequence; they are not scale templates. Two reference views show a raised-panel appearance. The build and cut lists here use the simpler flat plywood panel option throughout.
DIMENSIONS
Check the working envelope
Dimension
Inches
Millimetres
Overall width
62
1574.8
Carcass depth before front edging
23 1/4
590.6
Finished top depth with 3/8 in edging
23 5/8
600.1
Height including plywood top
22 3/4
577.9
Face frame width × height
62 × 22
1574.8 × 558.8
Each side opening, width × height
16 × 18
406.4 × 457.2
Center opening, width × height
24 × 18
609.6 × 457.2
Top and divider thickness
3/4
19.1
Outer sides and bottom thickness
1/2
12.7
Knobs and optional bottom-front molding can project beyond the stated carcass. Check room access, equipment depth, cable bends and ventilation before cutting.
STOCK FOR ONE PROJECT
Materials and fasteners
Shopping quantities allow a practical cutting layout with saw kerfs. Choose straight, dry poplar for a painted finish, or compatible stain-grade wood and veneered plywood. Measure actual sheet thickness before machining.
Quantity
Item
Size or specification
1 sheet
Cabinet-grade plywood
1/2 in (12.7 mm), 4 × 8 ft (1219.2 × 2438.4 mm); outer sides and all bottoms.
1 sheet
Cabinet-grade plywood
3/4 in (19.1 mm), 4 × 8 ft; top, dividers and adjustable shelves.
1 panel
Flat door plywood
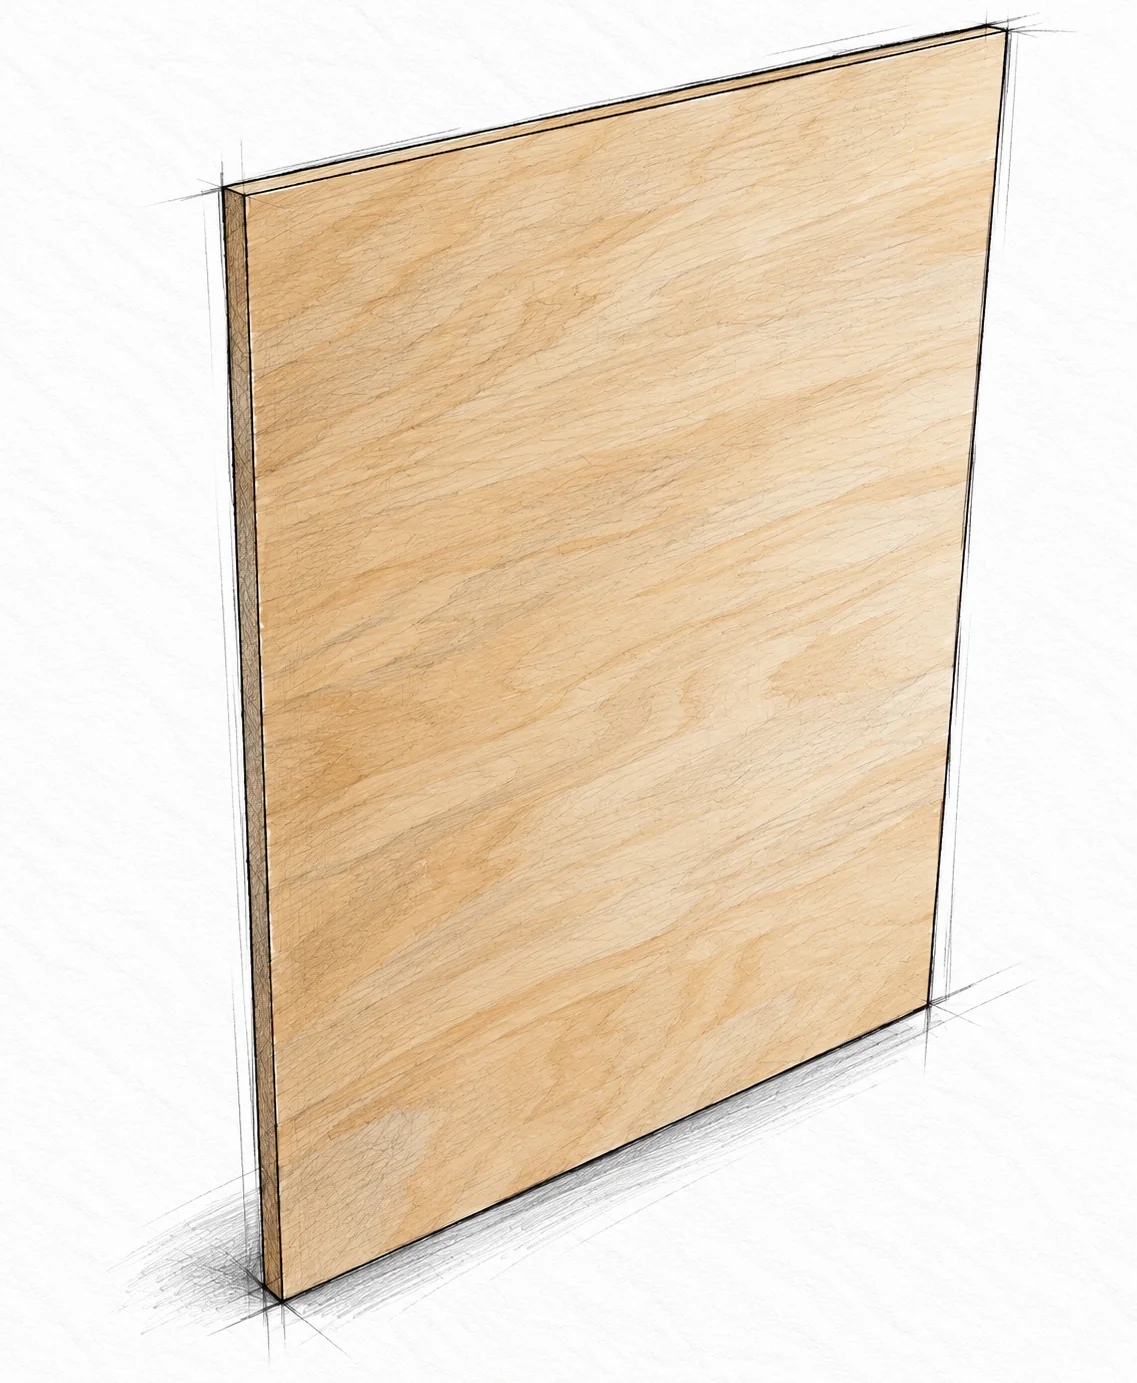
1/4 in (6.4 mm), at least 24 × 24 in (609.6 × 609.6 mm).
2 boards
Nominal 1×2, solid wood
8 ft (2438.4 mm) each. Actual 3/4 × 1 1/2 in (19.1 × 38.1 mm).
1 board
Nominal 1×3, solid wood
8 ft. Actual 3/4 × 2 1/2 in (19.1 × 63.5 mm); bottom face rail.
2 boards
Nominal 1×4, solid wood
8 ft each. Actual 3/4 × 3 1/2 in; rip to 2 3/4 in (69.9 mm) for door frames.
1 length
Top front edging
At least 62 in (1574.8 mm), plus trim allowance; 3/8 in (9.5 mm) thick × 3/4 in high.
2 lengths
Shelf front edging
At least 23 3/4 in (603.3 mm) each, plus trim allowance; thin stock matched to 3/4 in shelf edge.
STOCK FOR ONE PROJECT
Materials and fasteners
Hardware quantities are for this two-door console only. Buy the hinges, pins, doweling jig and pocket-hole system before machining their locations. Do not infer fastener length from an illustration.
Quantity
Item
Size or specification
16 pieces
Face-frame dowels
Two per joint, eight joints. Choose diameter and embedment with a doweling jig compatible with the narrow 3/4 in stock and rear dado locations.
1 supply
Wood glue
Interior woodworking adhesive; use its open time and clamp/cure schedule.
1 small box
Brad or finish nails
1–1 1/4 in (25.4–31.8 mm), for plywood-to-face-frame joints; use only where the nail will remain fully inside wood.
As required
Pocket-hole screws
For fastening the 3/4 in plywood top from the inside face frame and dividers. Select screw and jig settings for actual stock using the jig maker’s chart.
8 pieces
Shelf support pins
Four per shelf. Choose matching pins and drill diameter/depth; the common 1/4 in type is a reference, not a universal specification.
STOCK FOR ONE PROJECT / CONTINUED
Materials and fasteners
Quantity
Item
Size or specification
4 hinges
Inset door hinges
Two per door, rated for the door size/weight and compatible with 3/4 in doors and a face frame; include specified mounting screws.
2 pieces
Knobs or pulls
One per door, with bolts suited to the actual door thickness.
As required
Finish and abrasives
Wood filler, 120–150 grit paper, primer and paint or stain system, compatible clear protective finish.
As selected
Restraints and optional trim
Furniture/TV anti-tip equipment matched to furniture and wall substrate; optional bottom-front molding cut flush to the cabinet width.
WORKSHOP SETUP
Tools and preparation
Measure and mark
Use a tape, accurate square, marking gauge, sharp pencil, caliper and a long straightedge. Mark each part and its front, inside and bottom faces. Keep paired parts together.
Cut and machine
Use a supported track/circular saw or table saw for sheet goods; a miter saw or crosscut sled for solid stock. Use a router with guide or suitable dado setup for channels, and a safe jig for the door grooves and short rail tongues.
Drill and assemble
Have a drill/driver, doweling jig, pocket-hole jig, shelf-pin jig with depth stop, hinge installation tools, clamps and a brad/finish nailer or nail-setting tools. Use a flat assembly surface and protective cauls.
Work safely
Wear eye and hearing protection and suitable dust protection. Support both sides of each cut. Use guards, push blocks and featherboards as applicable; keep hands out of the cutter path. Unplug tools before setup changes. Never freehand short rail ends at a table saw.
PREPARATION
Lay out stock and test joints
Check actual thickness
Plywood trade thickness may differ from its label. The geometry assumes the stated thicknesses. Fit grooves to actual panels and recheck assembled spacing before cutting mating bottoms; do not blindly substitute thinner stock.
Sheet cutting allowance
One 1/2 in sheet can provide two 22 3/4 in (577.9 mm) wide strips for the five panels. Allow the blade kerf and trim rough edges first. Do not assume two cuts can share one uncut line.
Plan the 3/4 in sheet
Reserve the 62 × 23 1/4 in top first. A divider fits in the remaining length of that strip; the other divider and two shelves fit along the remaining sheet width. Confirm the actual sheet, grain direction and saw kerf on paper before ripping.
Solid-wood layout
The two 1×2 boards provide the 59 in rail, two 22 in stiles and two 18 in inner stiles. The 1×3 provides the 59 in bottom rail. Rip door stock to the actual 2 3/4 in width; a nominal 1×3 is too narrow.
Test before batch cutting
Use matching scraps to test dado fit, centered door grooves and rail tongues. Panels should slide into their channels without hammering. Preserve the thin web left between the opposed divider dados.
CUT AND LABEL BEFORE ASSEMBLY
Face-frame cut list
All values are finished actual sizes: length × width × thickness. Cut square ends. These parts form a 62 × 22 in (1574.8 × 558.8 mm) frame.
Part
Qty
Stock and use
Cut in
Cut mm
A
2
Solid wood / outer stile
22 × 1 1/2 × 3/4
558.8 × 38.1 × 19.1
B
2
Solid wood / inner stile
18 × 1 1/2 × 3/4
457.2 × 38.1 × 19.1
C
1
Solid wood / top rail
59 × 1 1/2 × 3/4
1498.6 × 38.1 × 19.1
D
1
Solid wood / bottom rail
59 × 2 1/2 × 3/4
1498.6 × 63.5 × 19.1
Opening check
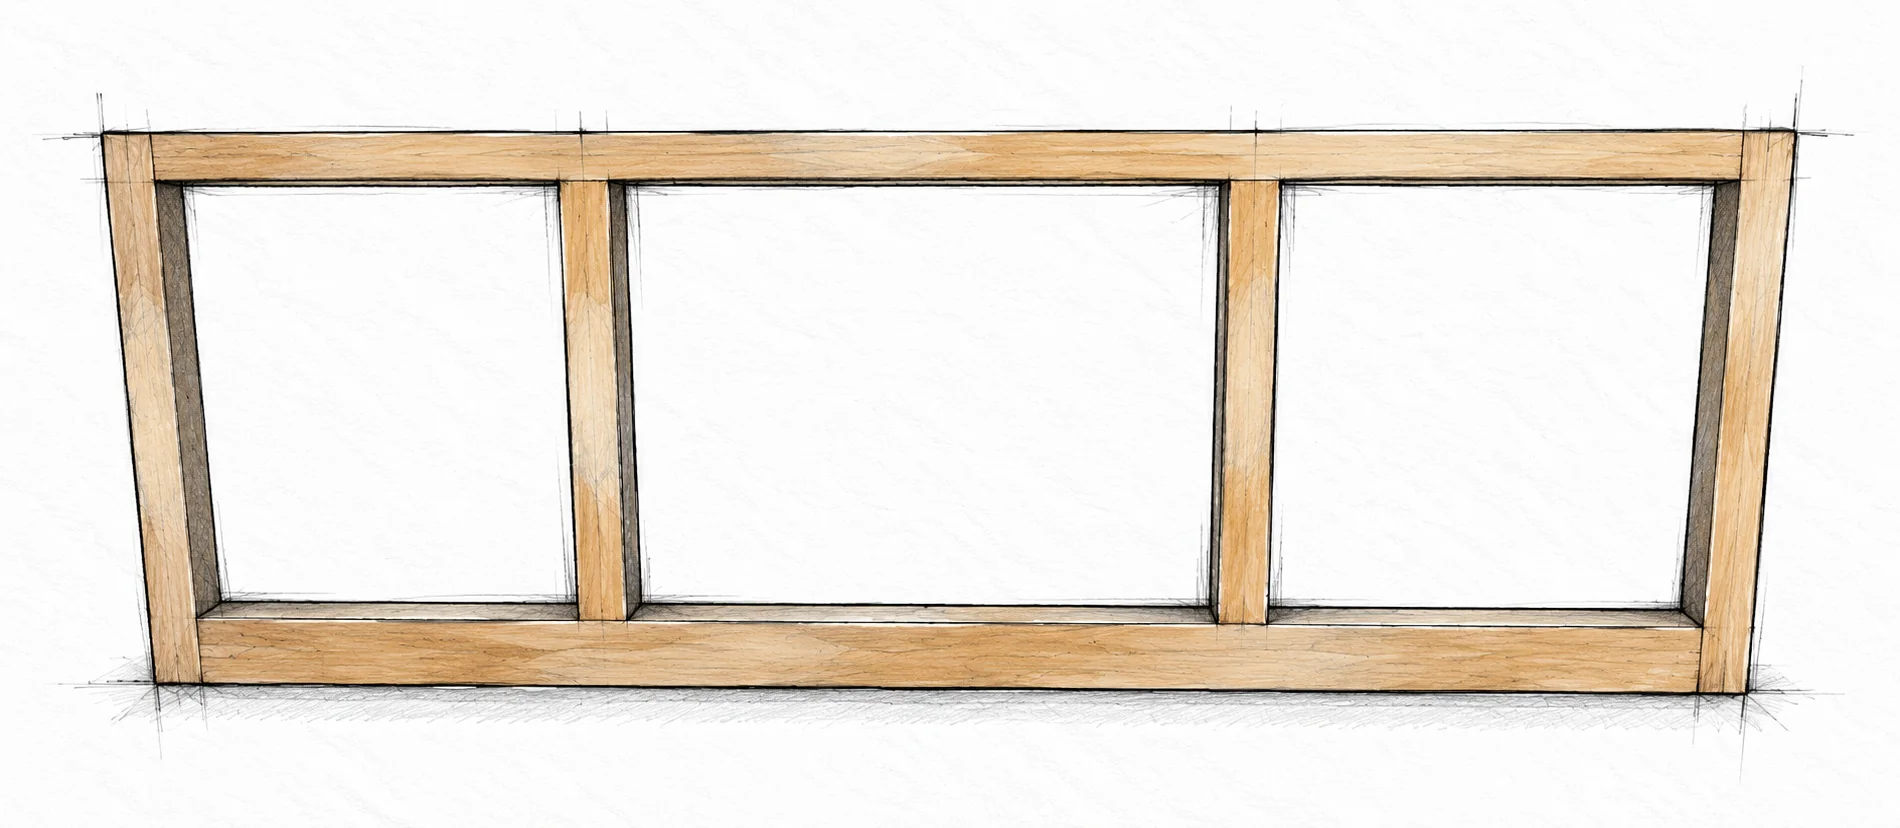
Across the width: 1 1/2 + 16 + 1 1/2 + 24 + 1 1/2 + 16 + 1 1/2 = 62 in. Vertically: 1 1/2 + 18 + 2 1/2 = 22 in. Mark the inner stiles from these openings, not by eye.
CUT AND LABEL BEFORE ASSEMBLY
Plywood cut list
Side/divider sizes are depth × height × thickness. Bottom, shelf and top sizes are width × depth × thickness. Lengths include the stated dado engagement.
Part
Qty
Stock and use
Cut in
Cut mm
E
2
1/2 in plywood / outer side
22 3/4 × 22 × 1/2
577.9 × 558.8 × 12.7
F
2
1/2 in plywood / side-bay bottom
18 1/4 × 22 3/4 × 1/2
463.6 × 577.9 × 12.7
G
1
1/2 in plywood / center bottom
24 1/2 × 22 3/4 × 1/2
622.3 × 577.9 × 12.7
H
2
3/4 in plywood / divider
22 3/4 × 22 × 3/4
577.9 × 558.8 × 19.1
J
2
3/4 in plywood / shelf
23 3/4 × 22 1/2 × 3/4
603.3 × 571.5 × 19.1
K
1
3/4 in plywood / top
62 × 23 1/4 × 3/4
1574.8 × 590.6 × 19.1
Top depth
The plywood top is 23 1/4 in (590.6 mm) deep. Its 3/8 in (9.5 mm) front edging makes the finished depth 23 5/8 in (600.1 mm). Do not cut the plywood itself to the finished depth.
TRIM
Edge-strip cut list
Part
Qty
Use
Length in
Length mm
L
1
Top front strip; 3/8 in thick × 3/4 in high
62, fit flush
1574.8
M
2
Thin shelf front strips; match shelf-edge height
23 3/4 each
603.3
Opt.
1
Optional bottom-front molding; fit to assembled width
62 nominal
1574.8
Cut edging slightly long, attach and trim flush. Check shelf edging depth against the available cabinet depth so the shelf front clears the face frame. The optional lower molding is decorative, not structural.
STEP 01 / CABINET AND DOOR CONSTRUCTION
Build the face frame
A × 2 · B × 2 · C · D · dowels and glue
Build the face frame · Farmhouse Media Console
Lay out the openings
Arrange the two outer stiles around the long rails. Place the two inner stiles between the rails to leave 16, 24 and 16 in (406.4, 609.6 and 406.4 mm) wide clear openings, each 18 in (457.2 mm) high.
Join and square
Use two dowels at each of the eight rail/stile joints, with the jig and dowels selected for the stock. Dry-fit first; keep joinery out of the later rear channels. Glue, clamp on a flat surface and compare both diagonals of every opening. Let the glue cure.
STEP 02 / CABINET AND DOOR CONSTRUCTION
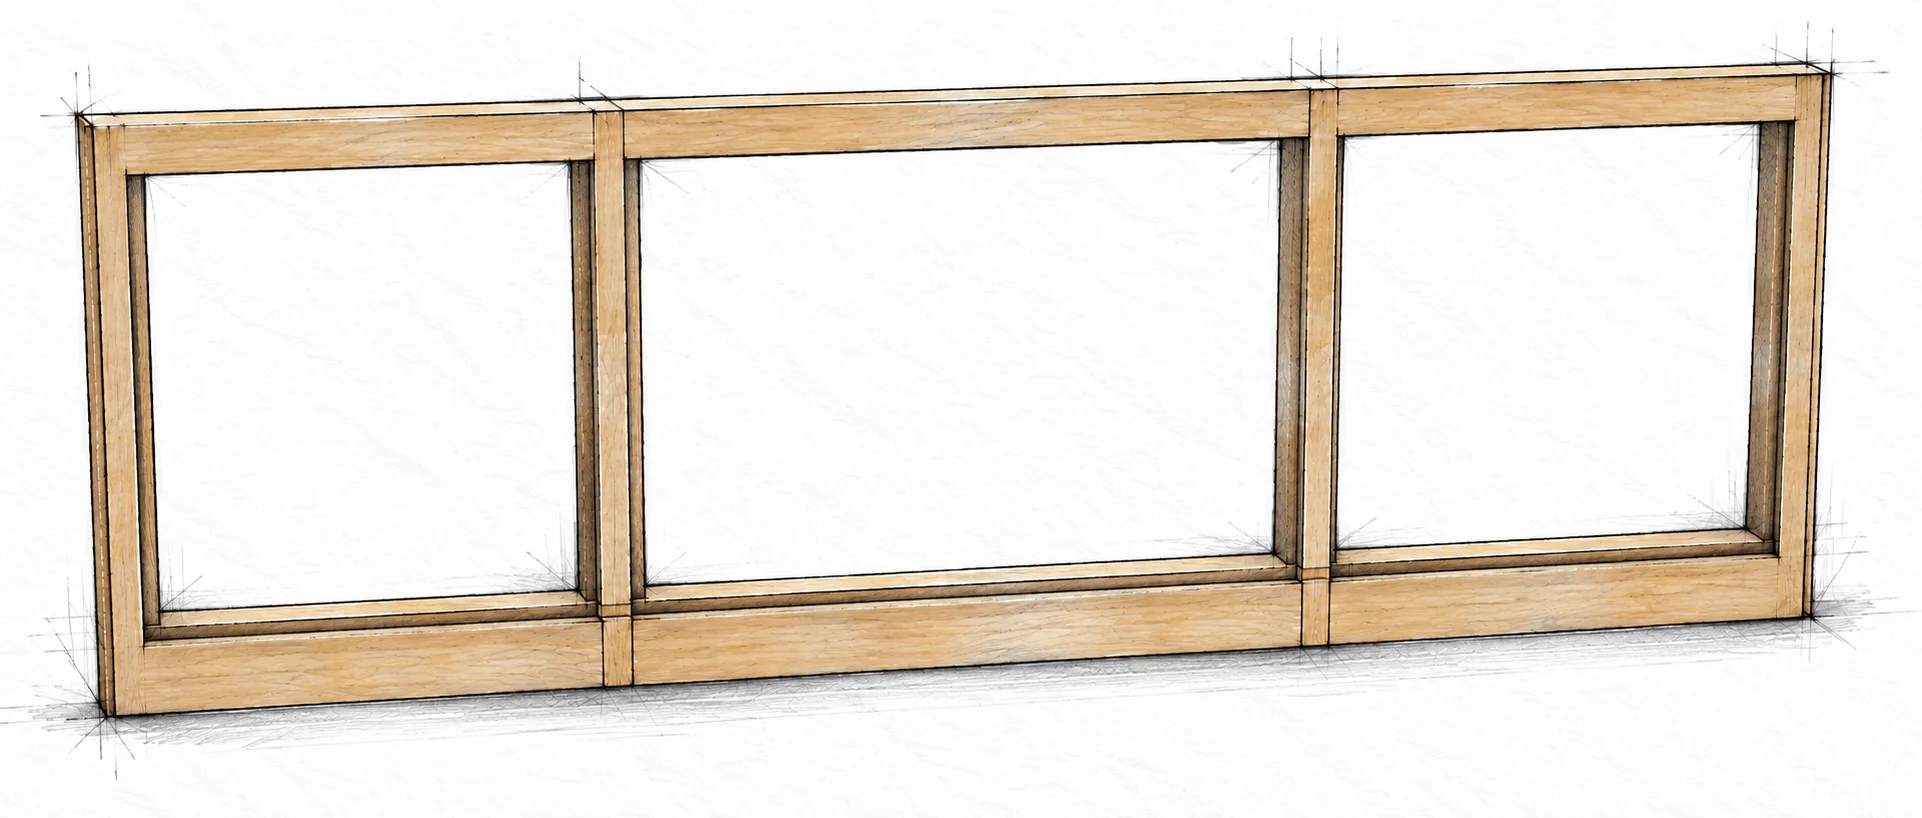
Machine the rear channels
Completed face frame · test scraps
Machine the rear channels · Farmhouse Media Console
Cut the locating channels
Keep the better face forward. On the rear, cut all channels 1/4 in (6.4 mm) deep. At each outside vertical edge, make a 1/2 in (12.7 mm) wide open rabbet for an outer side. Cut a horizontal 1/2 in wide channel from 2 to 2 1/2 in (50.8–63.5 mm) above the bottom.
Locate the dividers
Cut two 3/4 in (19.1 mm) wide vertical channels, each flush with an inside edge of the 24 in center opening. Test with the actual panels. Never cut through hidden metal; this is why joint and channel locations must be planned together.
STEP 03 / CABINET AND DOOR CONSTRUCTION
Dado the outer sides
E × 2 · 1/2 in plywood
Dado the outer sides · Farmhouse Media Console
Keep the faces mirrored
Each side is 22 3/4 in (577.9 mm) deep and 22 in (558.8 mm) high. Mark the inside face and bottom of each piece.
Form the bottom seat
On each inside face, cut a 1/2 in (12.7 mm) wide dado, 1/4 in (6.4 mm) deep. Its lower edge is 2 in (50.8 mm) and upper edge 2 1/2 in (63.5 mm) above the bottom. Test the fit without forcing the panel.
STEP 04 / CABINET AND DOOR CONSTRUCTION
Cut the side-bay bottoms
F × 2 · 1/2 in plywood
Cut the side-bay bottoms · Farmhouse Media Console
Make a matched pair
Cut two bottoms, each 18 1/4 in wide × 22 3/4 in deep (463.6 × 577.9 mm). Keep the front edge square to the sides.
Check the dry fit
Each bottom enters the outer-side dado, the divider dado and the face-frame channel. Its width includes 1/4 in (6.4 mm) engagement at each side. Use the actual assembled spacing to verify the fit before glue.
STEP 05 / CABINET AND DOOR CONSTRUCTION
Cut the center bottom
G · 1/2 in plywood
Cut the center bottom · Farmhouse Media Console
Cut the wider panel
The center bottom is 24 1/2 in wide × 22 3/4 in deep (622.3 × 577.9 mm). It spans between the two dividers, unlike the narrower side-bay bottoms.
Confirm the span
The clear center width is 24 in (609.6 mm). Add 1/4 in (6.4 mm) dado engagement on each side to reach the panel width. Check square corners and clean, undamaged edges.
STEP 06 / CABINET AND DOOR CONSTRUCTION
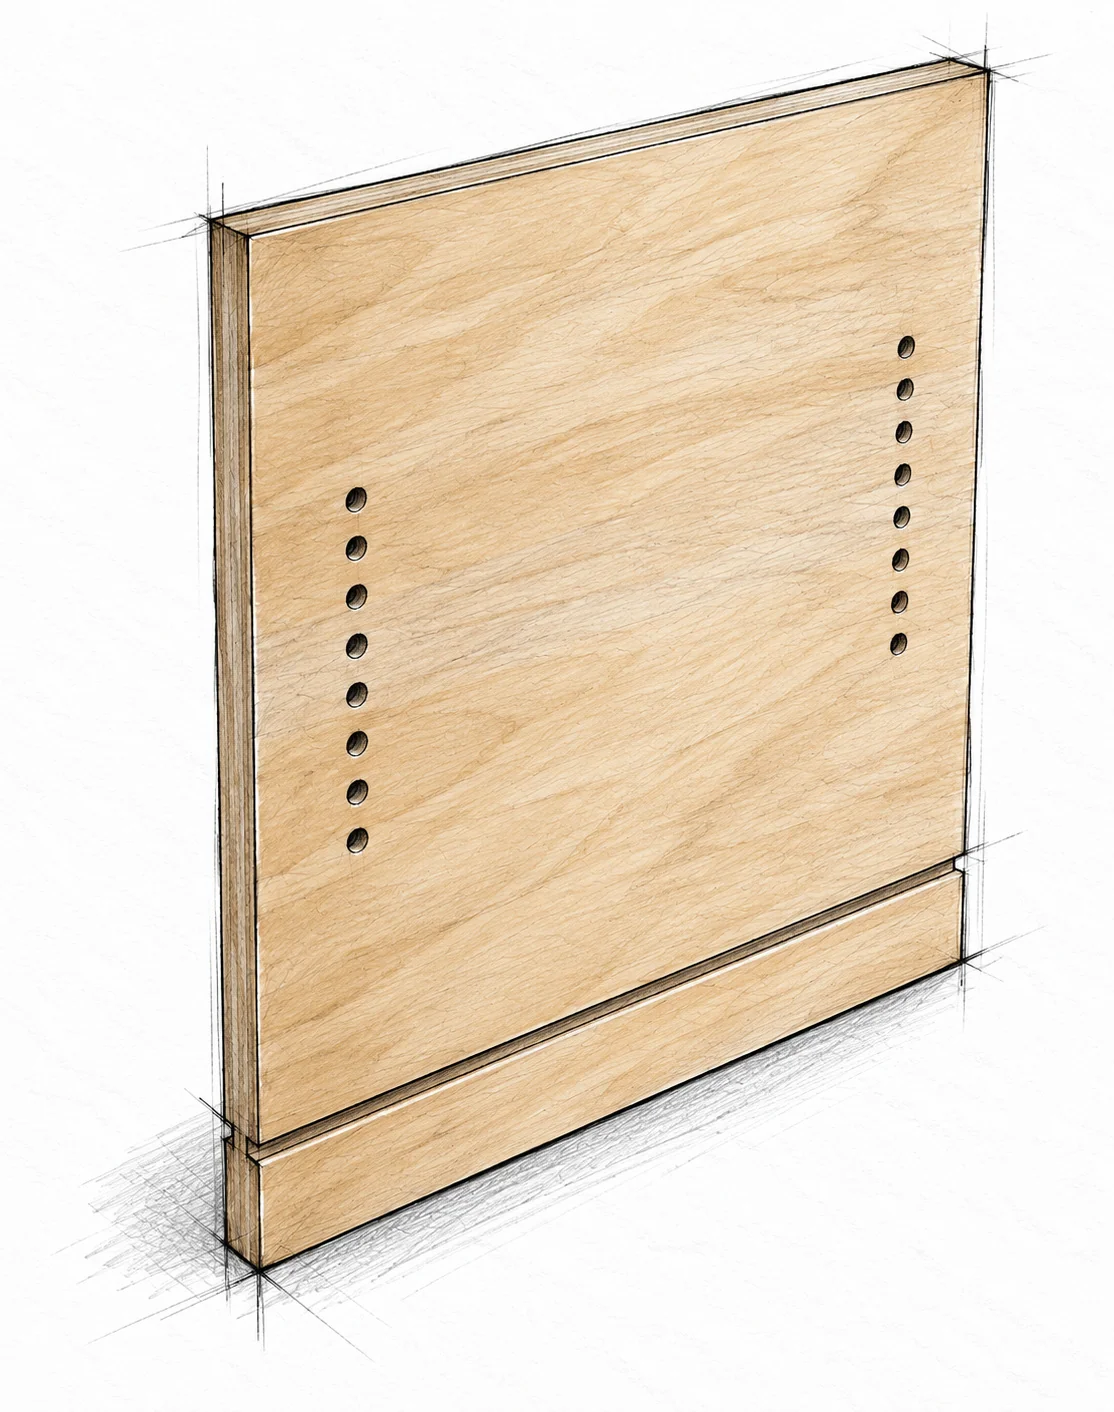
Prepare the dividers
H × 2 · shelf-pin jig and selected pins
Prepare the dividers · Farmhouse Media Console
Machine a mirrored pair
Each divider is 22 3/4 in deep × 22 in high (577.9 × 558.8 mm). Cut the bottom dado on both faces as detailed next. The shelf-pin holes belong on the faces looking into the center bay.
Drill matching pin rows
Use two rows per inside face, about 2–3 in (50.8–76.2 mm) from the front and rear edges. Use one jig and the same bottom datum on both dividers. Set hole diameter and blind depth to the chosen pin; do not drill through. All four supports for a shelf must be level.
STEP 07 / CABINET AND DOOR CONSTRUCTION
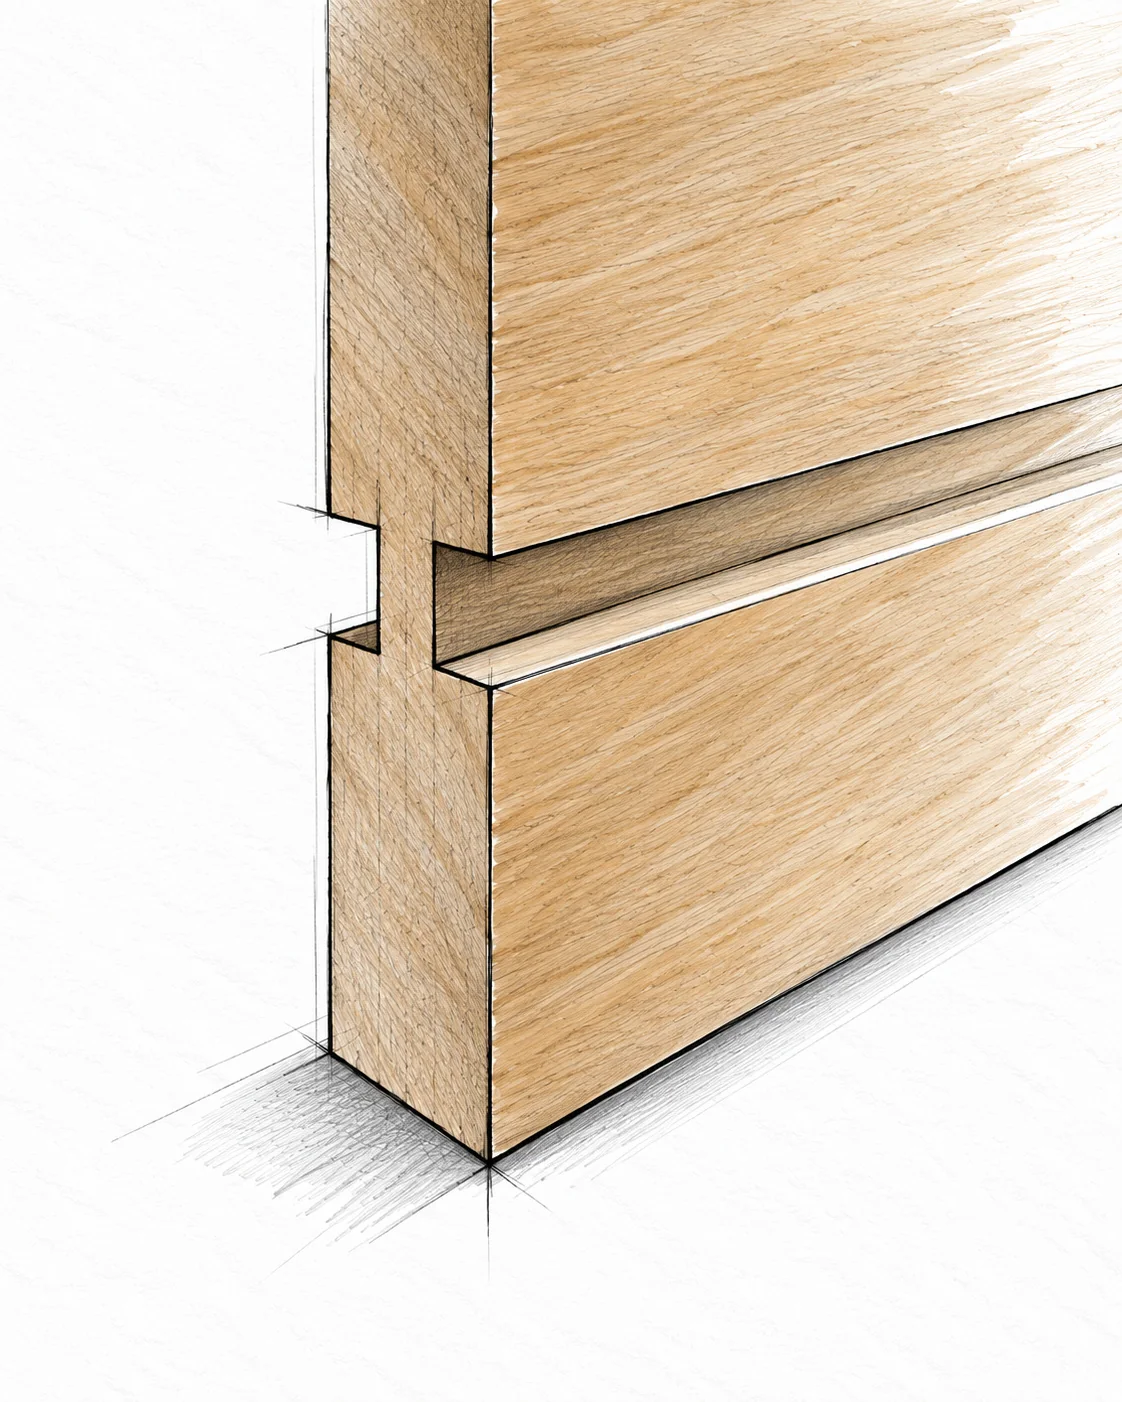
Check the opposed dados
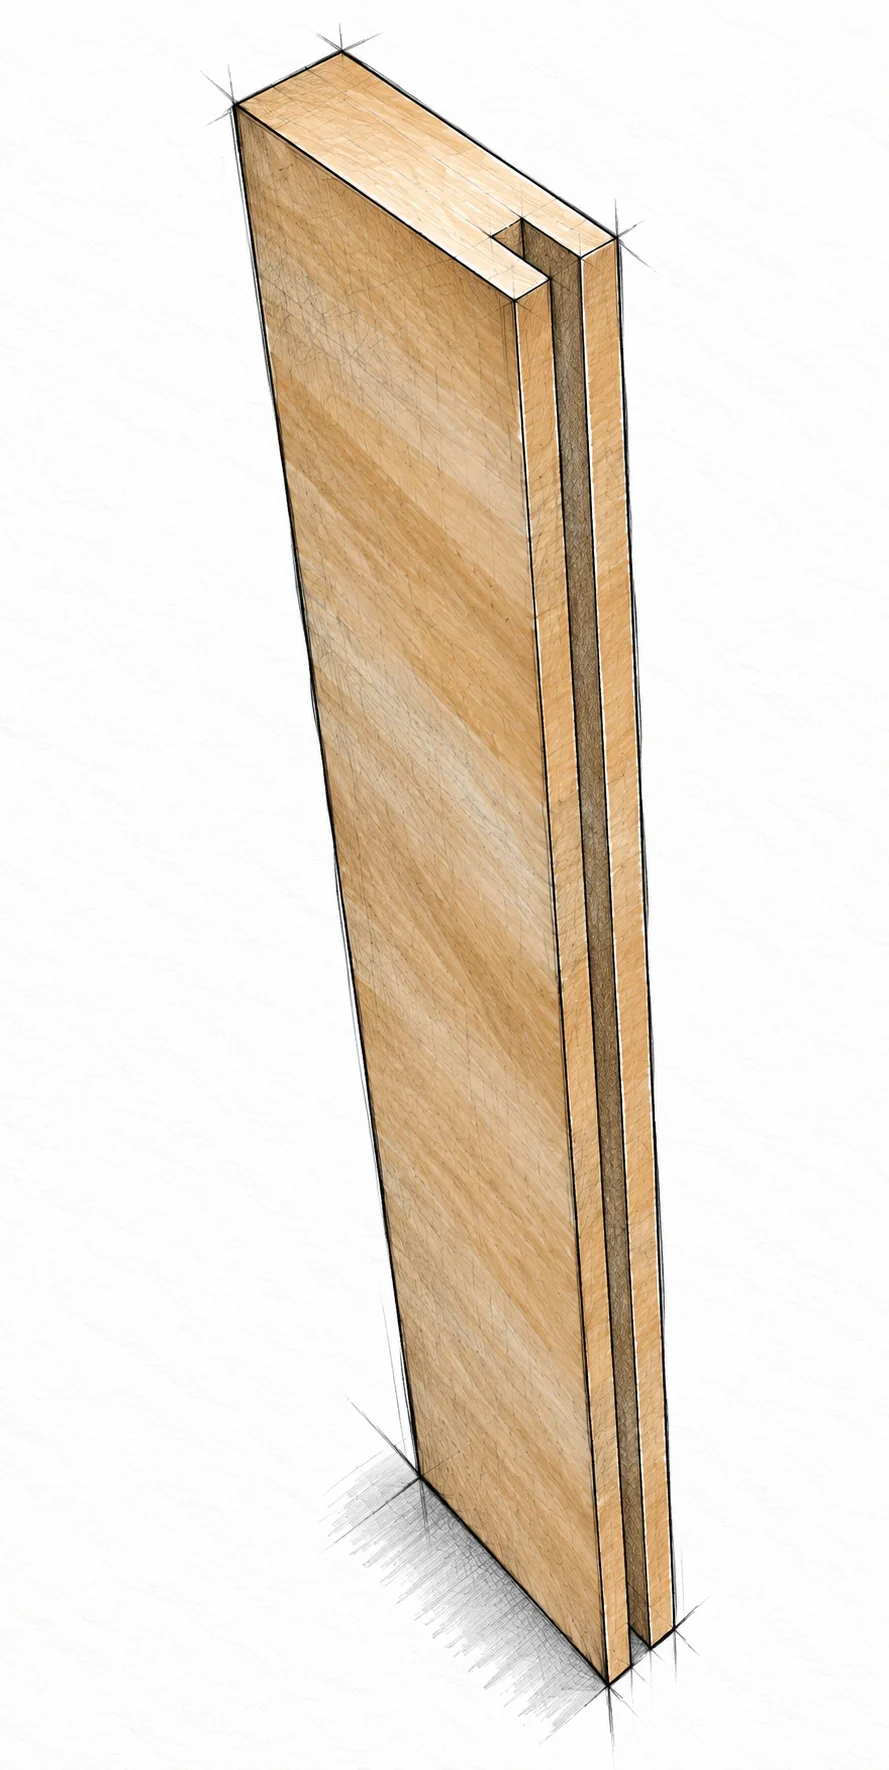
Divider close-up · H × 2
Check the opposed dados · Farmhouse Media Console
Keep both channels aligned
Each divider receives a 1/2 in (12.7 mm) wide, 1/4 in (6.4 mm) deep dado on each face. Both run between 2 and 2 1/2 in (50.8–63.5 mm) above the bottom.
Protect the central web
In 3/4 in (19.1 mm) stock, these cuts leave a 1/4 in (6.4 mm) web between them. Verify cutter depth on scrap and support the panel. Do not deepen both cuts to compensate for a poor fit.
STEP 08 / CABINET AND DOOR CONSTRUCTION
Prepare adjustable shelves
J × 2 · M × 2 · eight shelf pins
Prepare adjustable shelves · Farmhouse Media Console
Size and finish the front
Cut each shelf 23 3/4 in wide × 22 1/2 in deep (603.3 × 571.5 mm). Attach a thin solid-wood or molding strip to the front edge and trim it flush. Keep its top and bottom level with the plywood.
Check removable fit
The 23 3/4 in shelf width leaves clearance inside the 24 in center bay. Dry-fit on the selected supports without binding. Confirm the edged shelf clears the face frame and that every support seats fully.
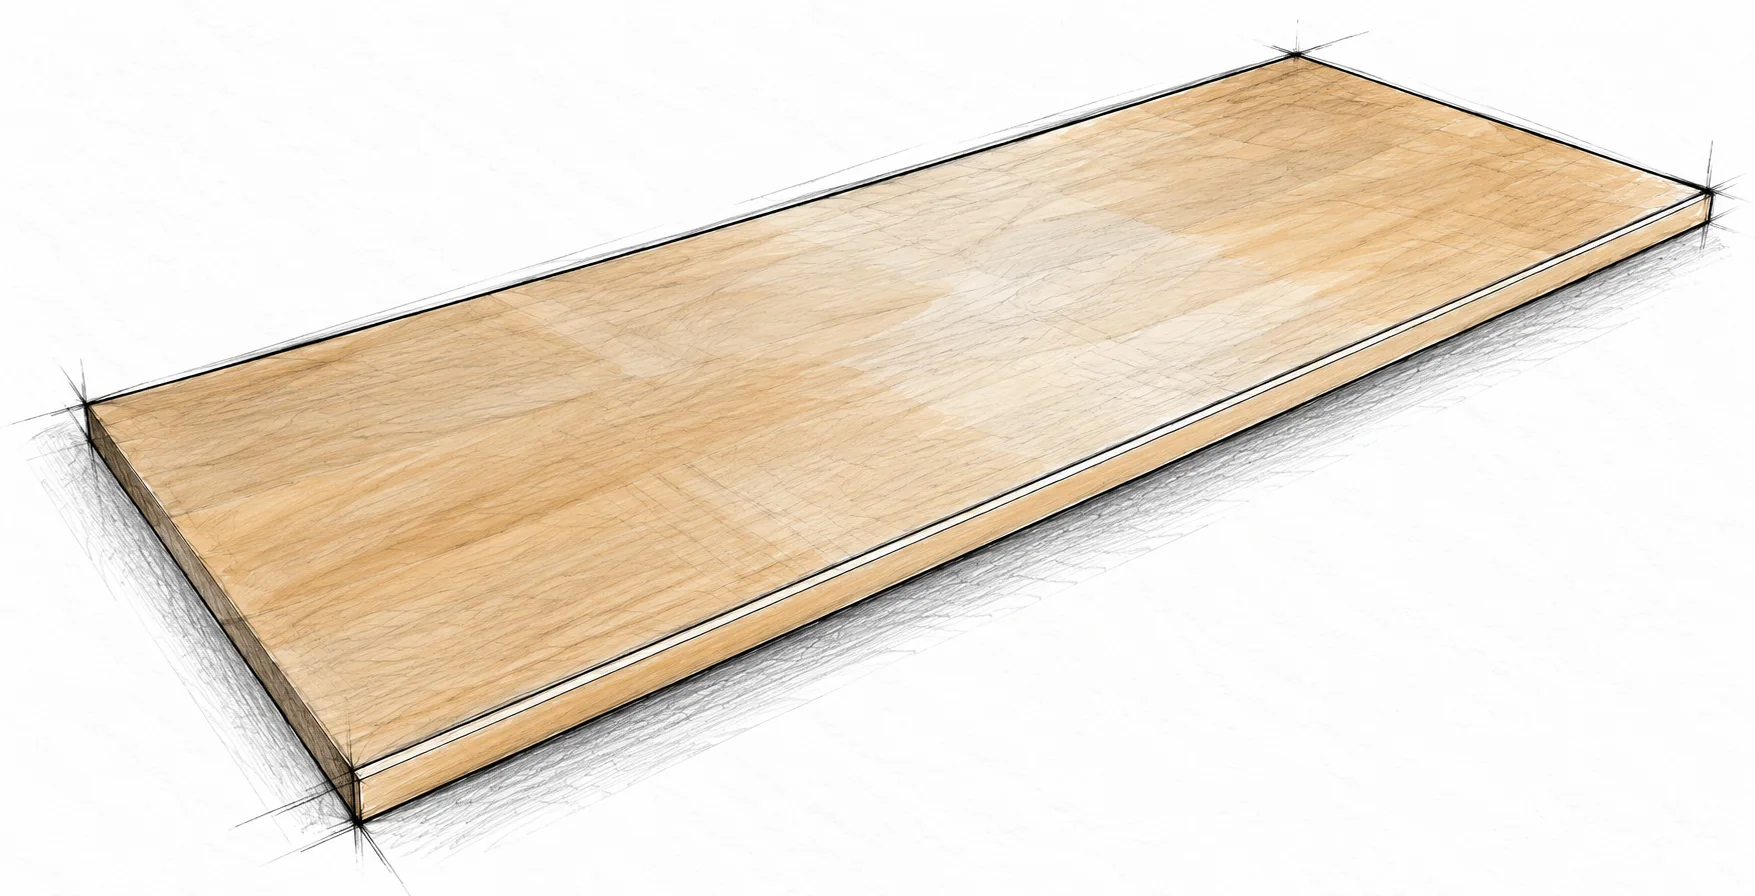
STEP 09 / CABINET AND DOOR CONSTRUCTION
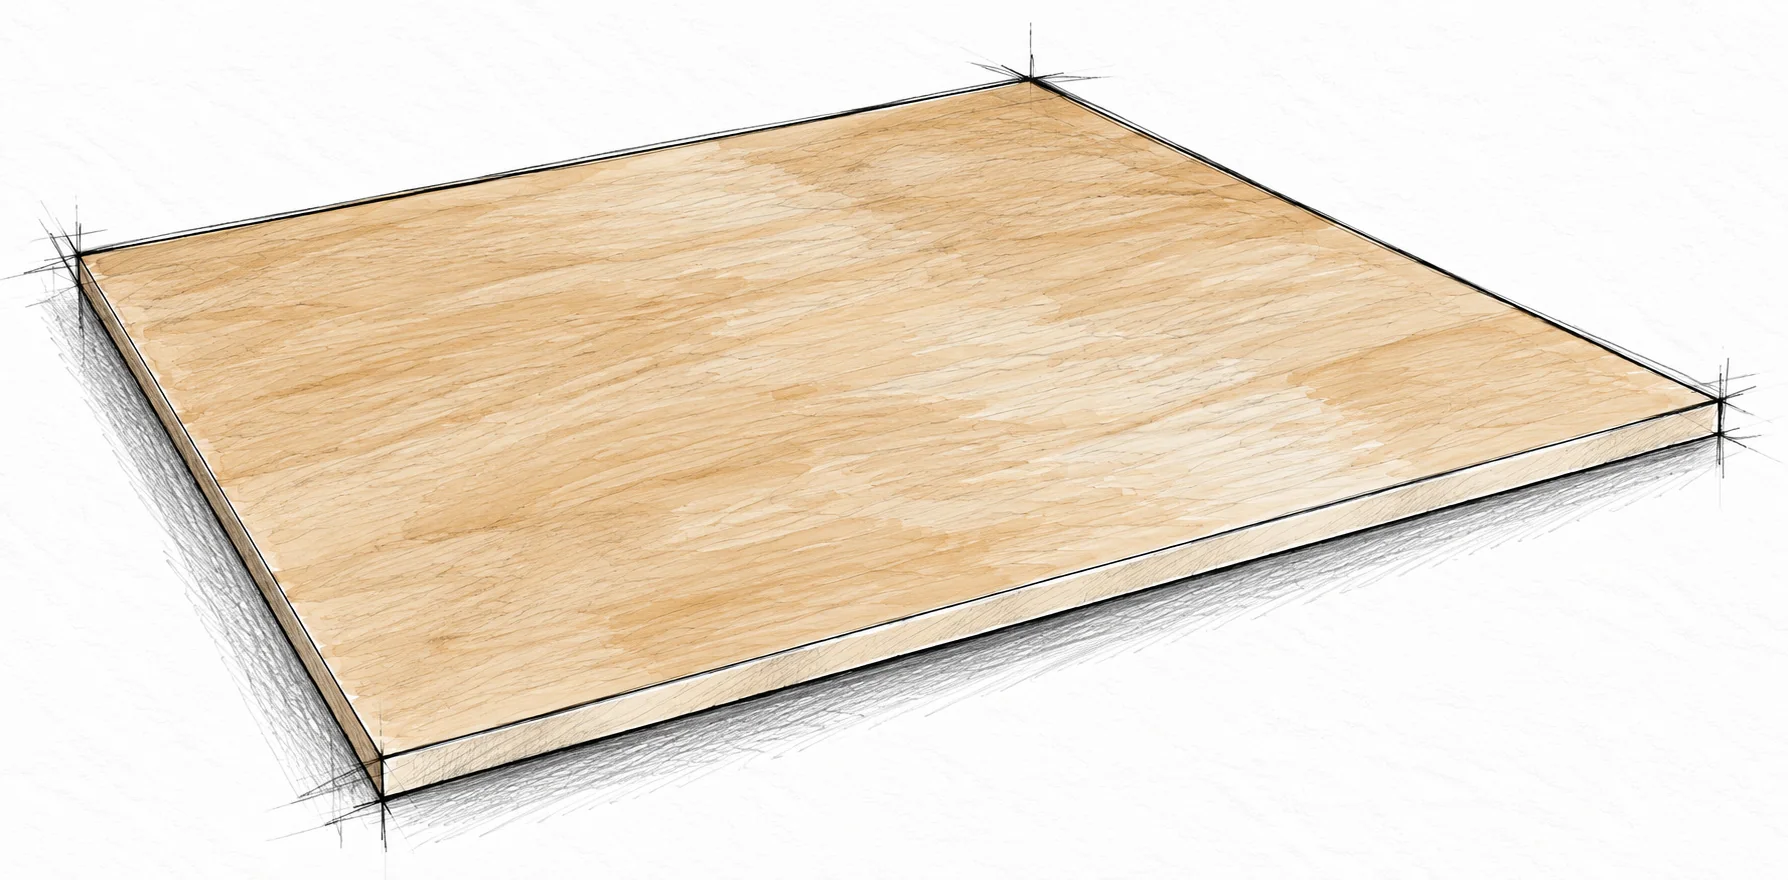
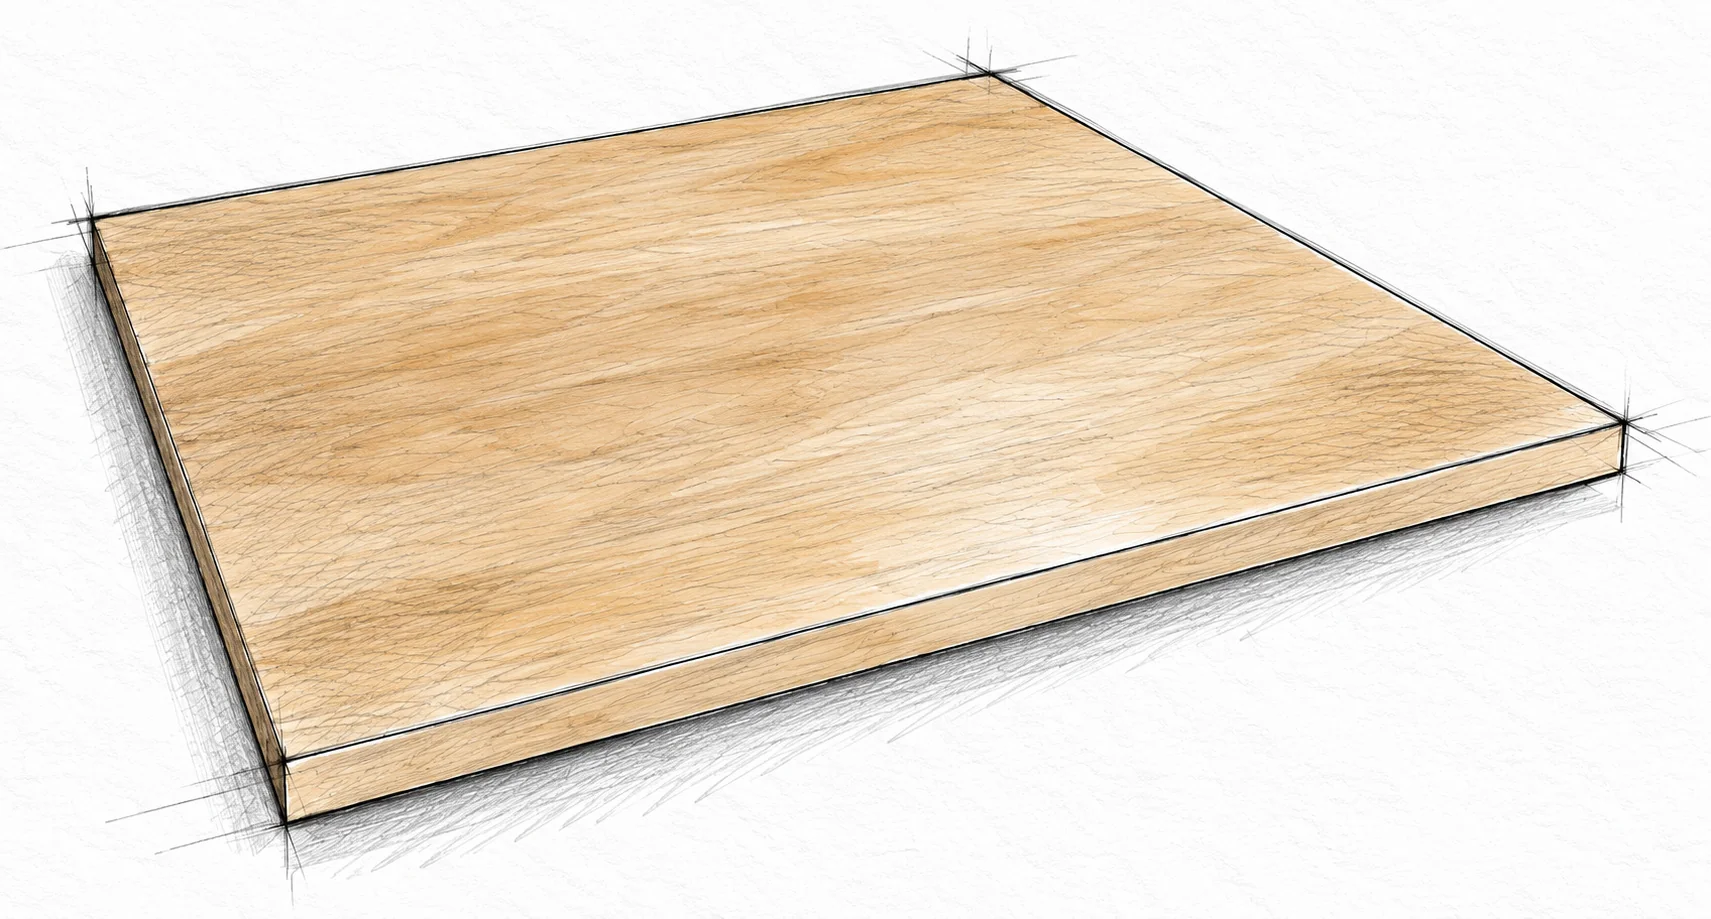
Prepare the plywood top
K · L · glue and edging clamps
Prepare the plywood top · Farmhouse Media Console
Distinguish panel and finished depth
Cut the plywood 62 × 23 1/4 × 3/4 in (1574.8 × 590.6 × 19.1 mm). The narrow front edging is 3/8 in (9.5 mm) thick and matches the 3/4 in edge height.
Make the edge flush
Glue the strip along the front, clamp with protected faces and allow it to cure. Trim its ends flush with the top. Sand the joint without thinning the veneer. Set the completed top aside until the carcass glue has cured.
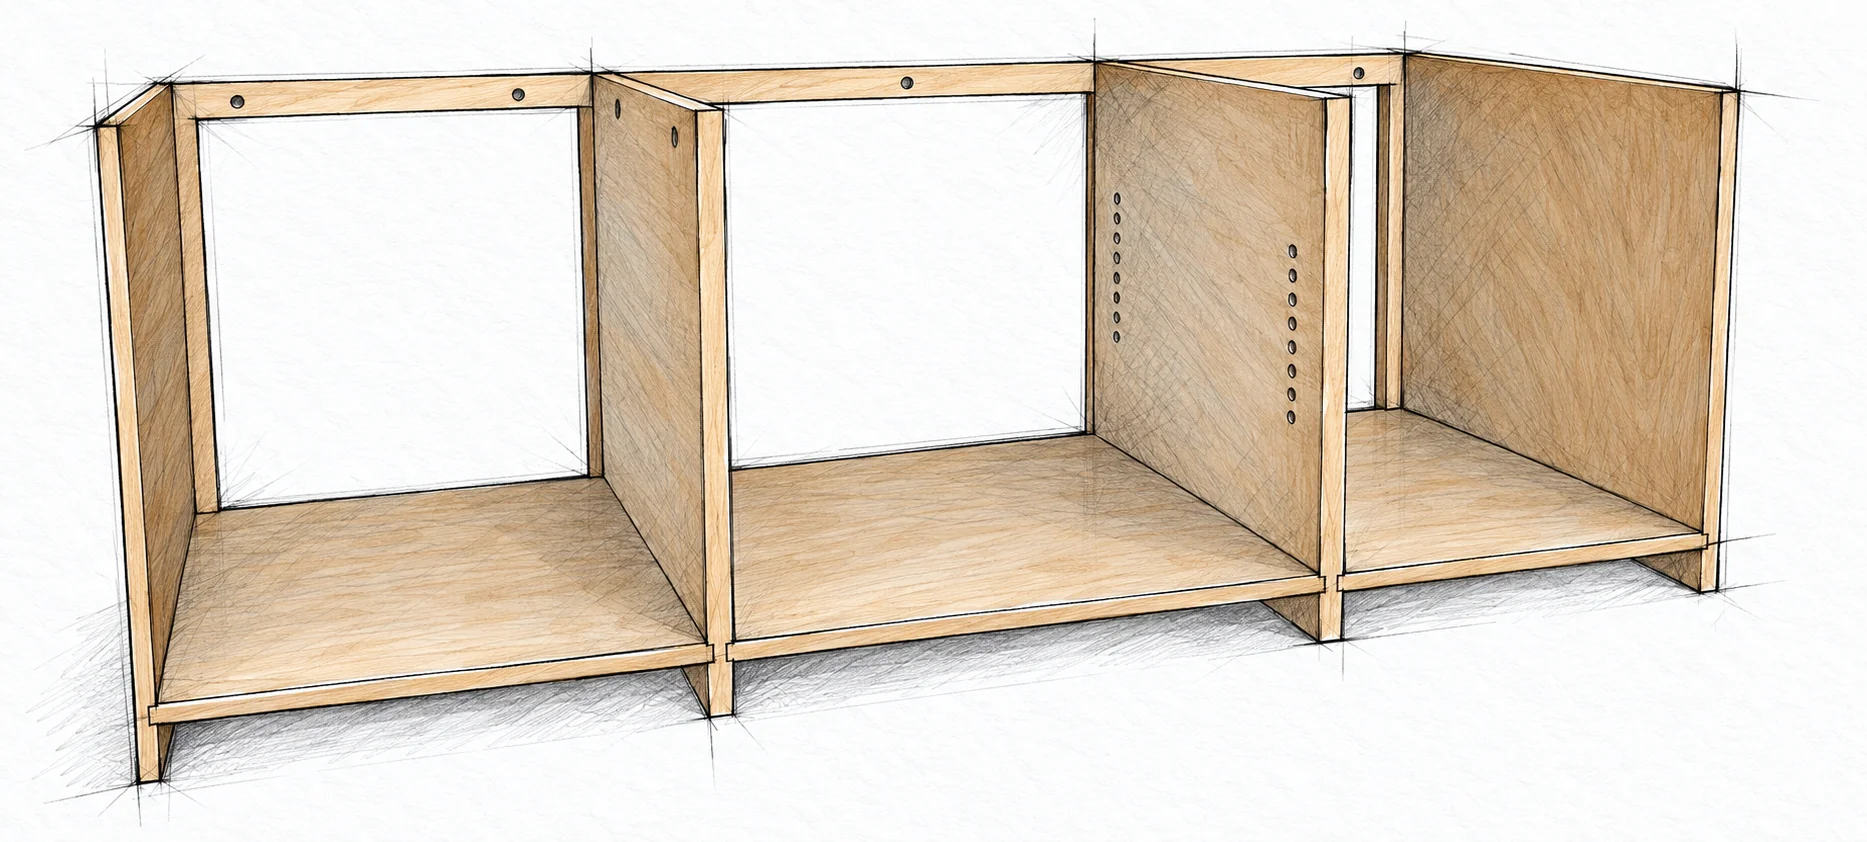
STEP 10 / CABINET AND DOOR CONSTRUCTION
Assemble the open carcass
E × 2 · F × 2 · G · H × 2 · face frame
Assemble the open carcass · Farmhouse Media Console
Dry-fit before gluing
With the face frame supported face-down, seat the sides, dividers and three bottoms in their matching channels. The rear remains open. Verify that each bottom is seated and that rear bay widths equal the front widths.
Glue, clamp and secure
Apply glue in the joints, reassemble and clamp square. Use temporary spacers to maintain the rear spacing while the glue cures. Add 1–1 1/4 in (25.4–31.8 mm) brads or finish nails through plywood into the face-frame joint where safely contained. Do not fit the top yet.
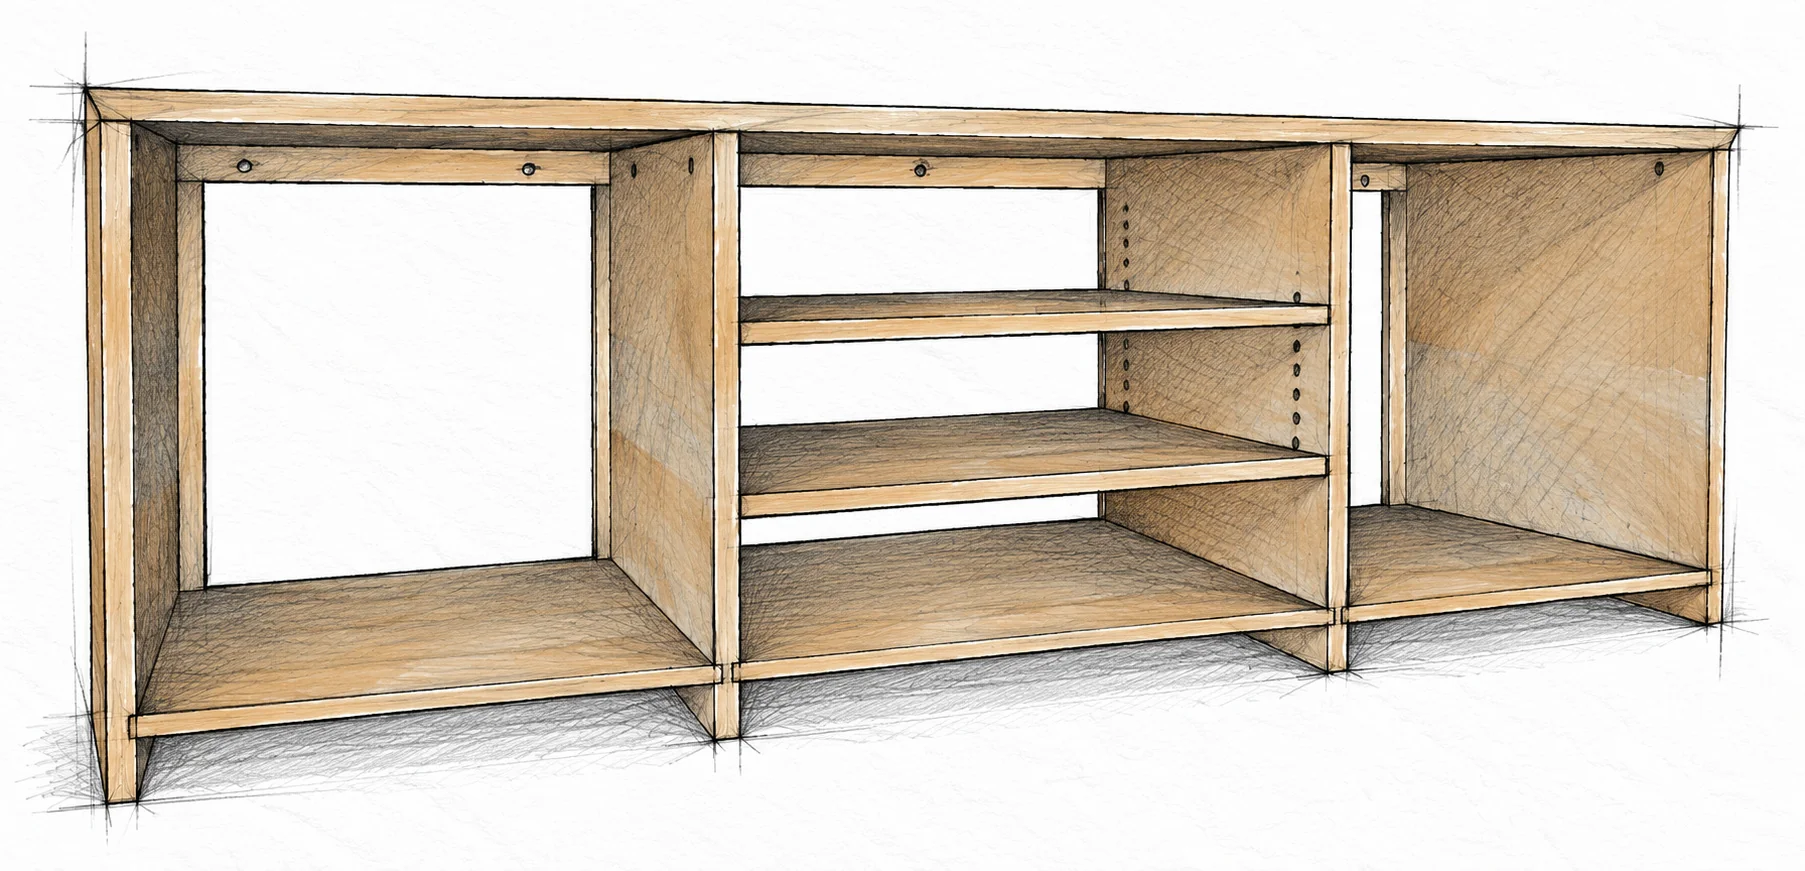
STEP 11 / CABINET AND DOOR CONSTRUCTION
Attach the top and shelves
K + L · J + M × 2 · pocket screws and pins
Attach the top and shelves · Farmhouse Media Console
Fasten after the carcass cures
Add pocket holes at the top inside face frame and suitable 3/4 in divider locations. Put divider holes on the side-cupboard faces, hidden by the doors. Select jig settings and screws for the actual stock; test that screws will not pierce the top.
Complete the open-backed case
Align the top flush with the carcass sides and rear; the front strip projects forward. Drive the pocket screws without over-tightening. Install four pins per shelf and set both shelves in place. Optional lower-front molding fits flush with the cabinet sides and bottom.
CONSTRUCTION REFERENCE
Review the finished form
Carcass reference · raised-panel appearance shown
Review the finished form · Farmhouse Media Console
Check the proportions
The low case has two side cupboards and three center openings formed by two adjustable shelves. The full width is 62 in (1574.8 mm); the top brings the height to 22 3/4 in (577.9 mm).
Use the selected door option
This reference shows a raised decorative panel. The following construction uses flat 1/4 in (6.4 mm) plywood panels instead. Do not copy the raised profile into the flat-panel cut list or add a back panel.
CONSTRUCTION REFERENCE
Check the door opening
One-door reference · decorative profile only
Check the door opening · Farmhouse Media Console
Measure each opening
Each side opening is nominally 16 × 18 in (406.4 × 457.2 mm). Measure the actual assembled openings separately; confirm square corners before making the doors.
Plan the inset fit
The illustration is a raised-panel appearance reference. Use the flat-panel parts and joinery on the next pages. Their 16 × 18 in assembled blanks are trimmed to fit the actual opening and selected inset hinges.
CUT AND LABEL BEFORE ASSEMBLY
Flat inset-door cut list
For TWO doors. Rail and stile dimensions are length × width × thickness. Panel dimensions are height × width × thickness. These are assembly-blank sizes, before final inset fitting.
Part
Qty
Stock and use
Cut in
Cut mm
P
4
Solid wood / door stile
18 × 2 3/4 × 3/4
457.2 × 69.9 × 19.1
Q
4
Solid wood / door rail, incl. tongues
11 1/4 × 2 3/4 × 3/4
285.8 × 69.9 × 19.1
R
2
1/4 in plywood / flat panel
13 1/4 × 11 1/4 × 1/4
336.6 × 285.8 × 6.4
Verify the joint arithmetic
Each rail has a 3/8 in (9.5 mm) tongue at both ends. Its exposed length is 10 1/2 in (266.7 mm); adding two 2 3/4 in (69.9 mm) stiles gives a 16 in door width. Panel size includes the groove engagement.
Fit rather than force
Test the actual plywood in the grooves. Adjust the panel and joints for a smooth dry fit without bowing the frame. Do not glue the panel edges into the grooves; only the rail/stile joints receive glue.
STEP 12 / CABINET AND DOOR CONSTRUCTION
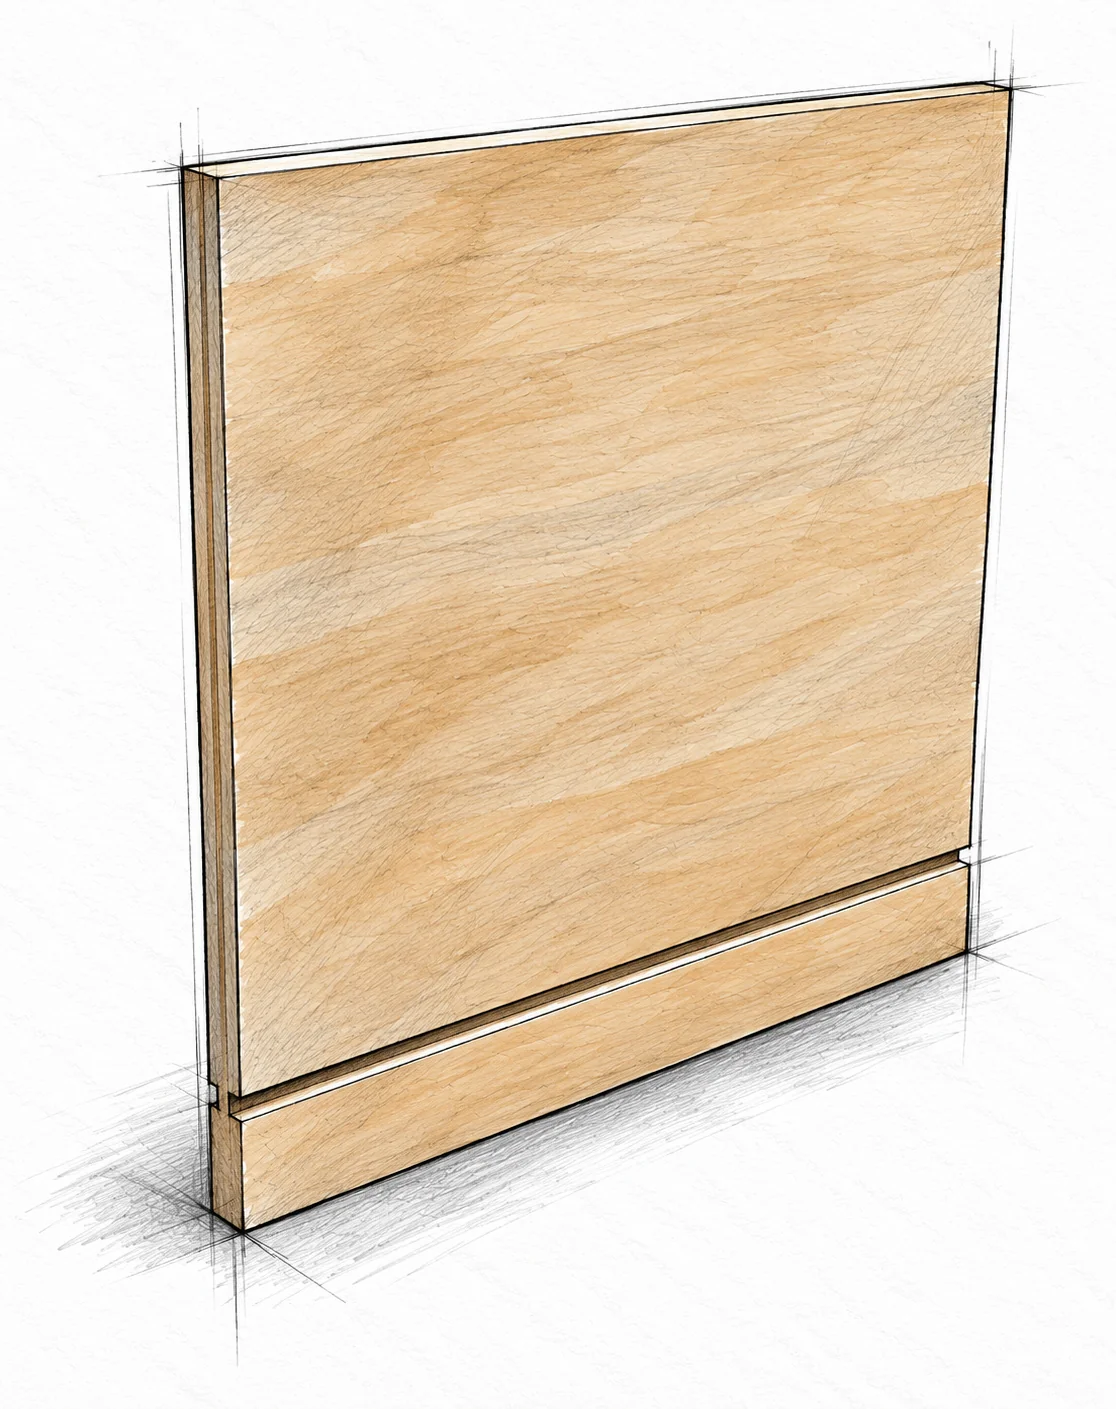
Groove the door stiles
P × 4 · practice offcut
Groove the door stiles · Farmhouse Media Console
Center the groove
Along the inside long edge of each stile, start the groove 1/4 in (6.4 mm) from a face. Make it 1/4 in wide × 3/8 in (9.5 mm) deep. In 3/4 in stock, this leaves equal 1/4 in cheeks.
Keep one reference face
Mark the door fronts and use the same machine reference for every piece. Run a test panel through the groove: it should seat smoothly without splitting a cheek. Do not round or sand the groove loose.
STEP 13 / CABINET AND DOOR CONSTRUCTION
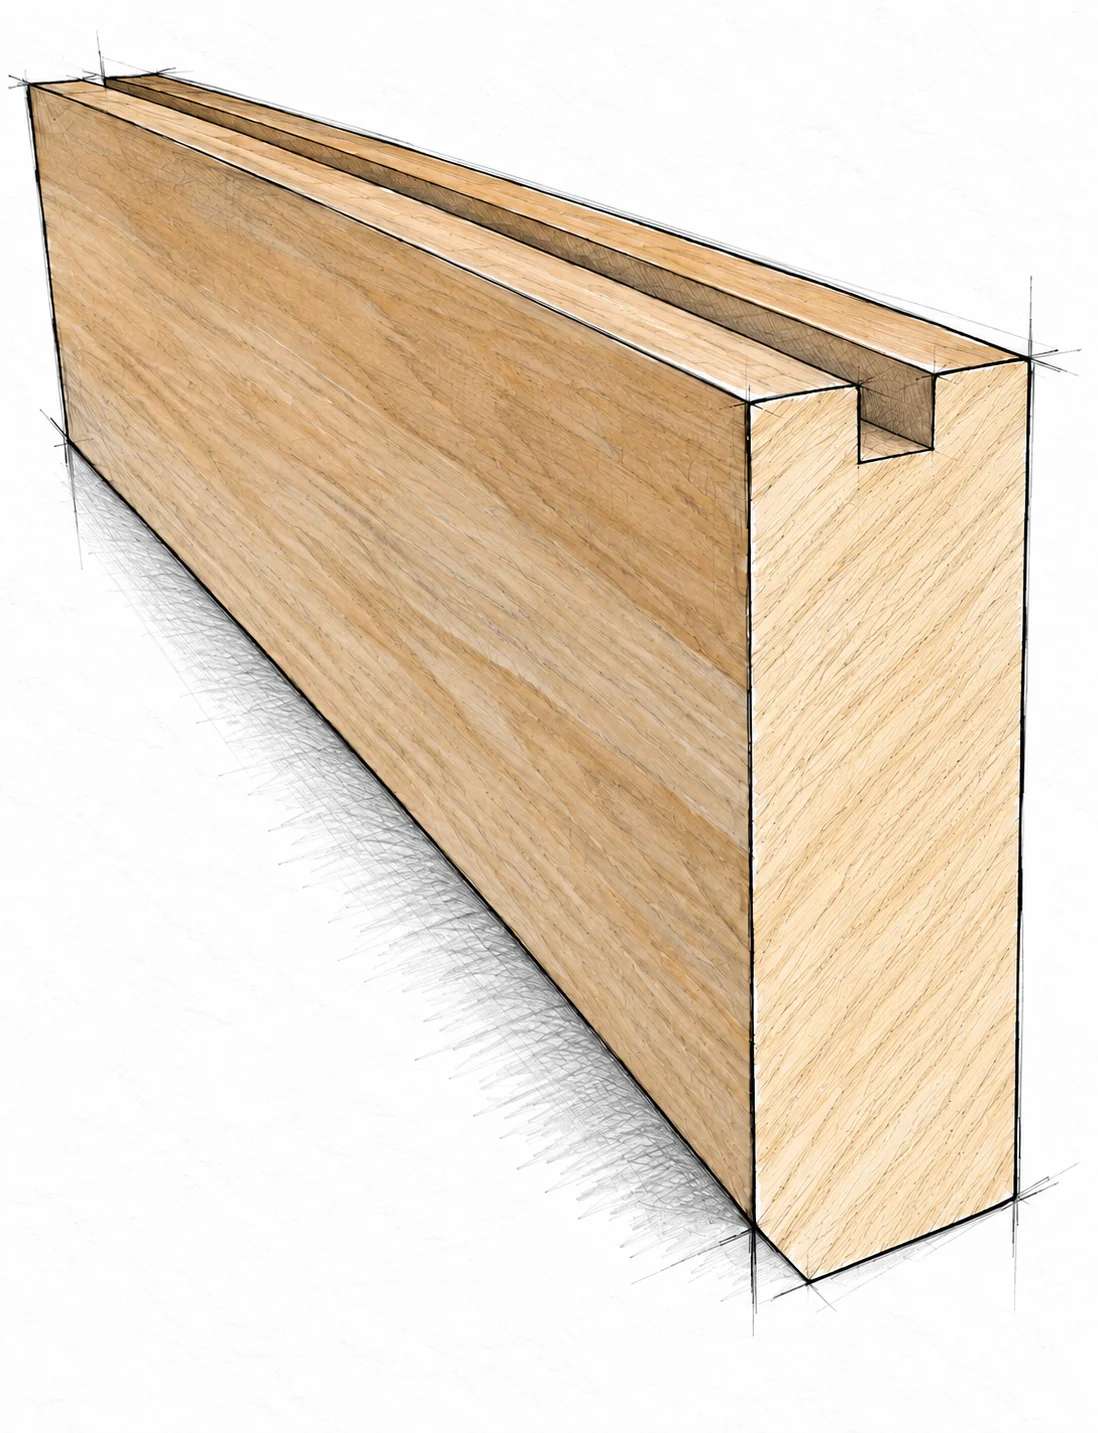
Groove the door rails
Q × 4 · same groove setup
Groove the door rails · Farmhouse Media Console
Repeat the centered channel
Cut the same 1/4 in wide × 3/8 in deep (6.4 × 9.5 mm) groove along the inside long edge of every rail. Keep the reference face consistent with the stiles.
Read the end detail
Before cutting tongues, the short end is flat except for the small notch where the long groove exits. Support each short rail with a suitable jig; do not bring fingers close to the cutter.
STEP 14 / CABINET AND DOOR CONSTRUCTION
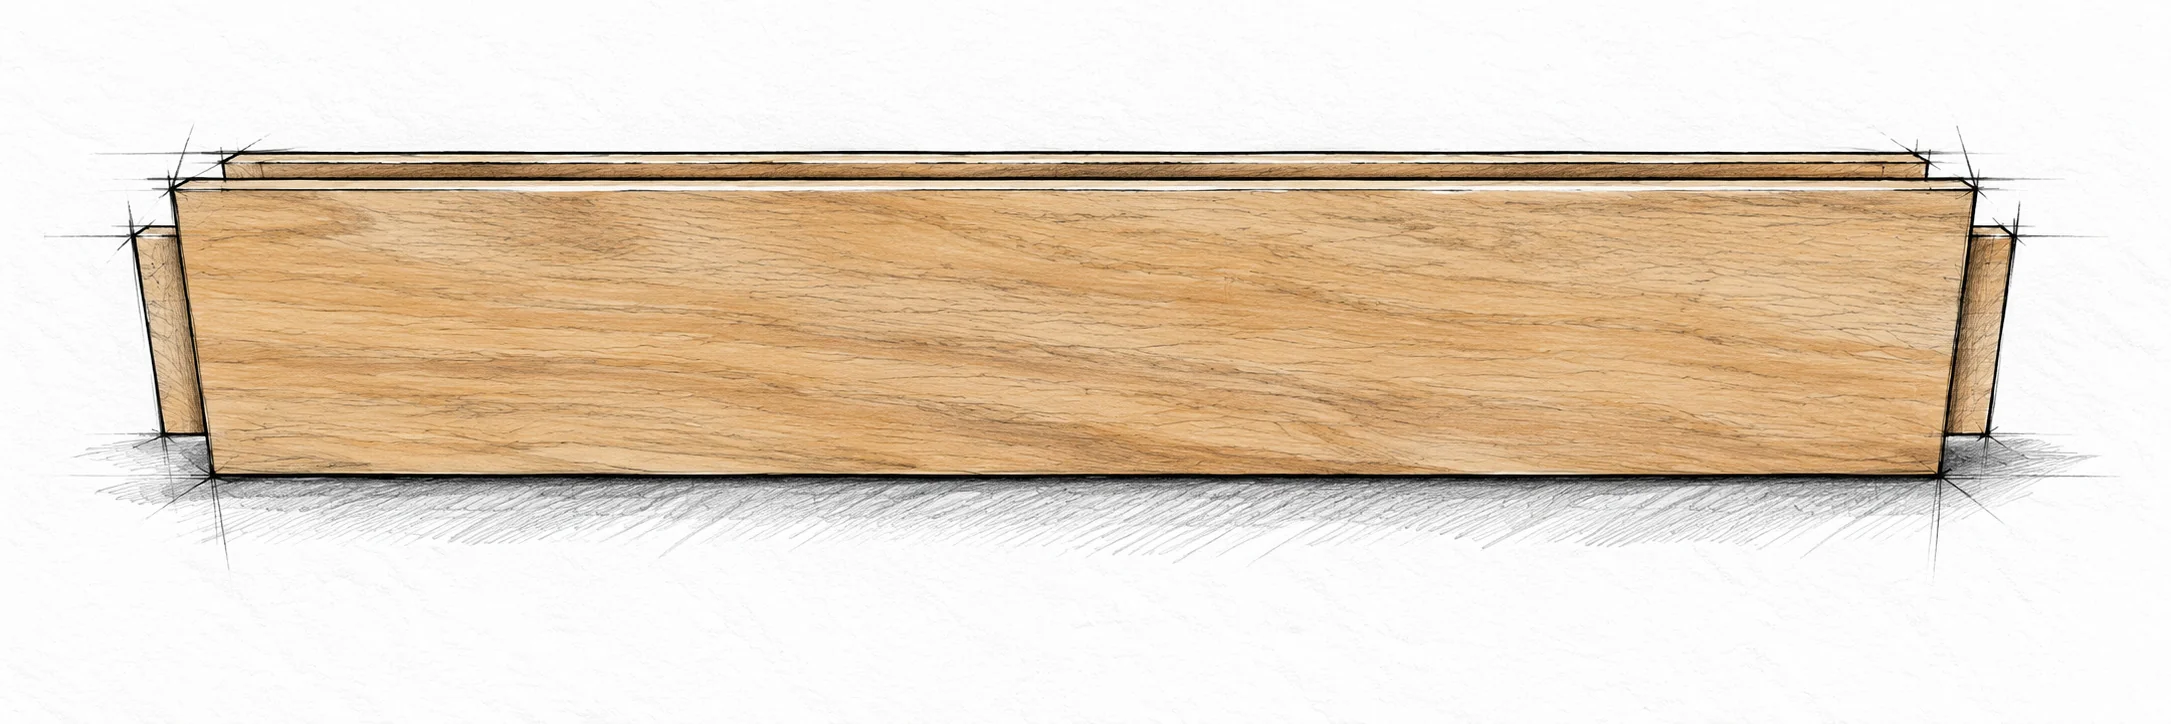
Cut the rail-end tongues
Q × 4 · eight rail ends
Cut the rail-end tongues · Farmhouse Media Console
Form equal shoulders
At each short end, remove 1/4 in (6.4 mm) from each broad face over a 3/8 in (9.5 mm) long shoulder. This leaves a centered tongue that enters the stile groove.
Tune the fit on scrap
The tongue should be just under 1/4 in (6.4 mm) thick so it slides into the groove without forcing. Take small test cuts, keeping shoulders square and both ends equal. The full rail length remains 11 1/4 in (285.8 mm), including both tongues.
STEP 15 / CABINET AND DOOR CONSTRUCTION
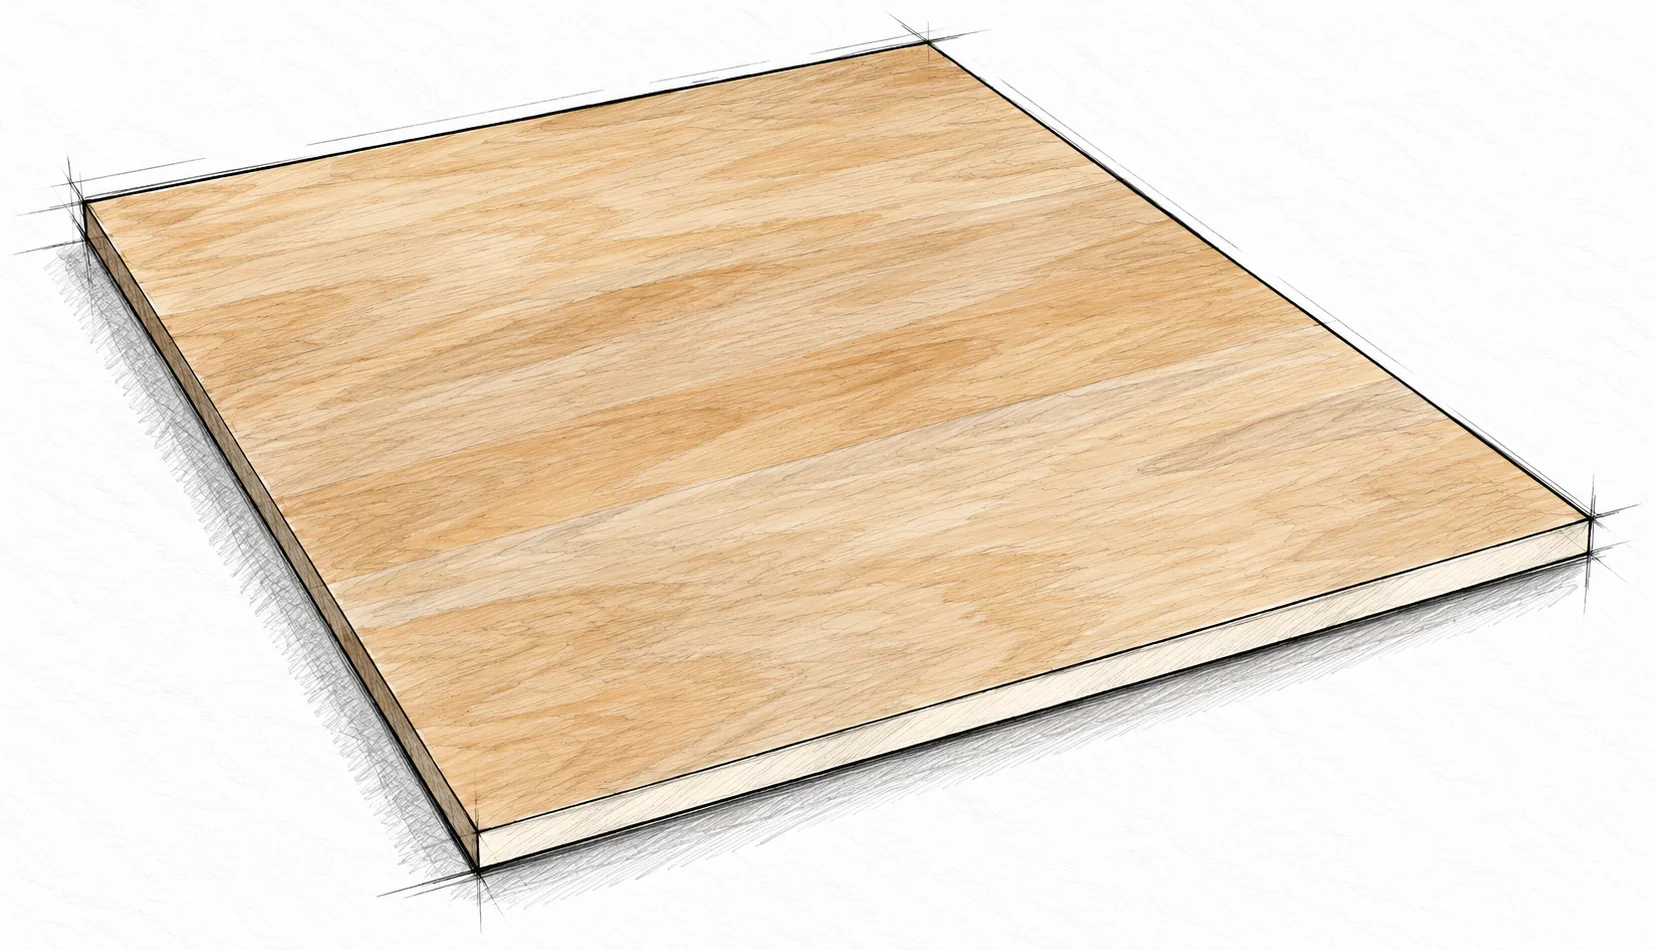
Fit the flat plywood panels
R × 2 · 1/4 in plywood
Fit the flat plywood panels · Farmhouse Media Console
Keep the panel flat
Cut each panel 13 1/4 in high × 11 1/4 in wide (336.6 × 285.8 mm). This is a plain flat plywood panel, not a routed raised panel.
Test all four edges
Dry-assemble each frame around its panel. The panel must enter all grooves without forcing the frame apart. Make small fit adjustments as needed for actual material. Keep glue out of the panel grooves.
STEP 16 / CABINET AND DOOR CONSTRUCTION
Assemble the two doors
P × 4 · Q × 4 · R × 2 · wood glue
Assemble the two doors · Farmhouse Media Console
Glue only the frame joints
Apply glue where each rail tongue joins a stile groove, not along the panel edges. Insert the flat panel and close the frame. Use protected clamps with opposing pads bearing on opposite outer edges.
Square and fit
Compare the door diagonals and adjust before the glue sets. Remove excess glue and allow the frame to cure. Dry-fit each door in its own opening; trim the outer edges only as needed for the chosen inset hinge thickness and an even operating gap.
HARDWARE FITTING
Hang and adjust the doors
Mark the hinge positions
Use two inset hinges on each door, located a couple of inches from the top and bottom as a starting position. Use the selected hinge instructions for exact setbacks, pilot holes, screws and any recessing. Verify screw length against the actual wood thickness.
Support the door while fitting
Hold the door at its intended reveal with temporary shims. Attach hinges using the manufacturer’s method, then open and close slowly. Check the hinge-side clearance, latch-side clearance and bottom edge. Make small adjustments rather than forcing a binding door.
Add one knob or pull per door
Select a location on the solid stile. Match paired handle positions and drill from a measured template with a backing block to limit tearout. Use bolts appropriate to the door thickness; tighten without crushing the wood.
Final moving-parts check
Both doors should open fully without rubbing the frame or each other. Each shelf must sit on all four supports and lift out without jamming. Remove temporary spacers and loose hardware before finishing.
FINISH AND INSPECT
Finish and place the console
Prepare the surfaces
Remove doors and hardware as needed. Fill nail holes and small gaps with a filler compatible with the planned finish. Allow it to dry, then sand through 120–150 grit. Remove glue residue and dust; avoid sanding through plywood veneer.
Apply a compatible finish
For paint, prime first and allow it to dry before painting. For stain, use the appropriate wood conditioner and stain system. Apply a compatible clear protective coat; a non-ambering water-based finish preserves pale paint. Follow product ventilation, drying and curing directions.
Reassemble and inspect
Refit the doors, hinges, pulls and shelves after curing. Check every joint and fastener, the full seating of shelf pins and the even support of the case on the floor. A loose or racking case is not ready for use.
Place safely
Use appropriate furniture and TV anti-tip restraints installed to the hardware maker’s instructions and actual wall substrate. Keep cords out of door paths and maintain equipment ventilation. Do not climb, sit or stand on the console or allow children to play inside.
Use within verified limits
No tested load capacity is specified. Confirm suitability for the actual equipment and shelf loads before use; keep heavy items low and distributed. Seek qualified assessment if a load is uncertain. Recheck hardware and joints periodically.
 FREE WOODWORKING PLAN